Thursday, March 31, 2011

A Few Clowns Short...


Don't you  just love this saying?  LOL.  I can't stop laughing. 
 I downloaded the font from FontSpace it is called Coffee Tin

You can view the video above and see that this was altered
 to make a post it's easel.  I was inspired by viewing 
THIS creation by Joeknee on SCS

Below I am showing you one without a flap as Joeknee had made.
I placed a flap over the post it's because of the colors of the pads.
These are made as little gifts to go with the cards for my
Sister's tour table at Canton's after prom.
Was headed her way this AM but Little J
ended up getting sick.  Have to 
reschedule Mom's play date;)


Okay, now this little pic was rediscovered over the weekend.  I don't think I
have stopped laughing since.  It is Donna driving and Liz is the passenger.
Take a good look at the garage wall.  OMGoodness, does it get
any better then that?  This beauty is going on a T for Donna;)

This is also why I REFUSE to take Little J to Disney.
All I did at the park was visit every single bathroom and listen to Liz screaming
because she was frightened of  EVERYTHING!  So with little J being
frightened of mascots I have no plans of a 
Disney vacation anytime soon.


Product list...
SU dp (retired SB kit), scallop circle, ribbon and cardstock
Cricut Expression
Cricut lite Carousel 
Marvy scallop punch
paper shapers circle punch
Terrifically tacky tape by Provocraft
Dimensional dots from Recollections
Post It's
computer/printer/coffee tin font
MM star and circle brads

A few
Clowns
short 
of
a
Circus!

Lol!!

Happy Stamp Day.  May God Bless our country and the world.
Wednesday, March 30, 2011

Sporting a New Blogger Template


The name for this Template is Picture Line.  On the Homepage you now see cropped photos of posts.Link to the post of your choice by clicking on the title above the picture.  I am going to be featuring one video a week that will remain on top of the page. Below this you will start with a link to the current post and descending from there.


I decided to take this route because I have had many people request info on a post that can take time or sometimes I can't find it!  I know!  Now you have lots of options to see instantly in conjunction with the search bar it should take less time to find what you are looking for.

The linkwithin operates as before, click on a thumbnail to see the full post.

I enjoy this template.  What do you think?

Version:1.0
Author: Anugrah Pasau
url: http://www.dzignine.com

Tuesday, March 29, 2011

Photo Play Gift Set

I loved this pic and I have had much fun playing around with using it in different ways.  Today I have a gift set to show you making use of the Glass Tiles and PTI Tins I just can't get enough of.

Photo from HERE


Listen to some Traditional music as you scroll and surf;)

Okay, here is a class photo...

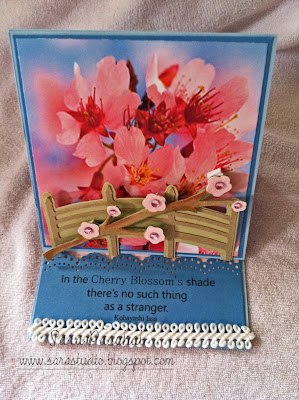
 Here is the card I made it using SCS tutorial on Easel Cards found HERE.  It has been a very long time since I did one of these.  However, you most likely are going to be seeing more of them around;)
The bridge was cut from Cricut Pagode Cartirdge at 2" one on regular one on shadow. I did not write the branch cuts down they were left over from my weekend MESS!  

 I found this quote that I just loved it reads...
"In the Cherry Blossom's shade
there's no such thing
as a stranger."
Kobayashi Issa

 Here is a shot of the tin and tile necklace.  I sure hope you make one of these beauties soon they are such fun.  My girls love them so do their friends.  What great gifts they make!  I printed out the photo, punched it with a Marvy circle punch then micro beaded the top.  I wrapped strips of extra photo around the upper lid and punched another circle this time from cardstock to place in the bottom of the tin.

Product list...
Cricut Expression
Cricut Pagode cartridge
PTI cardstock and bling
SU cardstock
computer
photo printer
photo shop
circle punches
diamond glaze
E6000 adhesive
1" glass tile
Bevel
Chain
2" tin 
Vintage loopy ribbon unknown
MS border punch
Recollections Sticker Butterfly
Terrifically Tacky Tape
Micro Beads
Dimensional foam dots

 Happy Stamp Day.  May God Bless our Country and the World.

Monday, March 28, 2011

Springtime Cherry Blossoms Abound

So want to get to DC and view this splendor.  I have been there before not in spring and not in this part of town.  If it is anything as fragrant as Honeysuckle and Magnolia in the south it has to be wonderful.  
Today I am taking you on a little web tour of some of 
my favorite places and Cherry Blossom Goodies.
Enjoy;)


Cherry Blossom Girl by Air
Took two days and one huge mess to get this single creation made.  I was having trouble with the design.  I so wanted to use the Cricut Pagoda cartridge but my ideas were not working out in paper.  My Sister no doubt is laughing away at this point;)  We passed around a SU sellabration set for years that neither of us wanted.  I did not give up I kept working at it every time I passed by I tweaked something and this is the final product...


I cut the branch in PTI kraft and blossoms out in pink pirouette and rose red.  Next I pulled the layers apart and crumpled them up.  Stacked and crumpled more then placed a gem in the center.
I used this download to create the card above printed out on Pirouette Pink, Rose Red and Wild Wasabi.

 Cherry blossom Coloring page from freecoloringsheets.net

Cherry Blossom Bites from cutoutandkeep.net

Link HERE to the National Cherry Blossom Festival website

I found a bunch of beautiful little things HERE MyWeddingFavors.com
Coasters, candles and BROWNIES!  YUMMY!!

Etsy pendant necklace

Product list...
Cricut Expression
Cricut Pagoda Cartridge
SU Wild Wasabi, Pink Pirouette and Rose Red
PTI Bling and Kraft cardstock
Michael's Ribbon
Loopy Vintage Ribbon Unknown
Nestabilities Lacey Circles
Computer/Pinter


Happy Stamp Day.  May God Bless our Country and the World.

Sunday, March 27, 2011

Work?


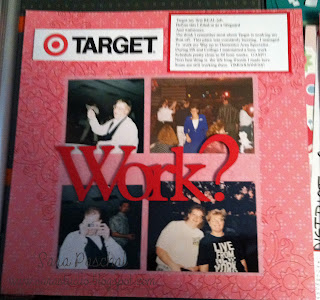
When Donna was in the Hospital we spent long nights just chatting.
 She asked me what life
was like before kids..
She wanted to know about my jobs and what I liked to do.
She wanted to hear of my friends and my adventures.

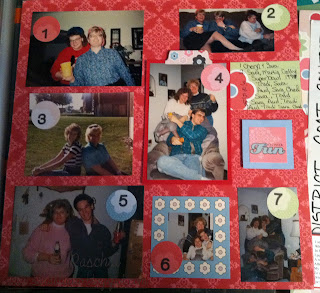
 I decided to scrap a bit of my history surrounding her questions.
You can click on
each page to see the larger version.
No fancy layouts or supplies.  Once again I am going for
easy so I can say I have gotten something accomplished.
Otherwise my page counting friends might kick me out of
the group.  JK;) they wouldn't do that.

My goodness if you love your job so much can you still
call it work?

My first REAL job as you see below was for Target.  I worked my way
through HS and College here.  I left them for bigger adventures after graduation.

Target two page layout...


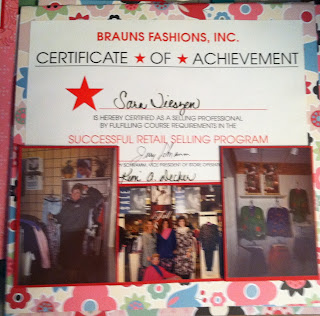
The Bigger adventure I left Target for was an Assistant Manager at Braun's Fashions.  Since I was not 21 yet I could not be a store manager.  When I hit that BD milestone I was given my own store in Fort Dodge IA.
Braun's 2 page layout...


Talk about a fun job.  I worked in a Historical Building
at a Historic Time for Praxis "SAP" consulting Group.
Then I decided to get back to what I really loved
Merchandising and Display
and I took a Visual Specialist job with Kohl's. 

I placed an extra pic of the historical marker...

Here is the two page Praxis and Kohl's layout...

Happy Stamp Day.  May God Bless our Country and the World.


Saturday, March 26, 2011

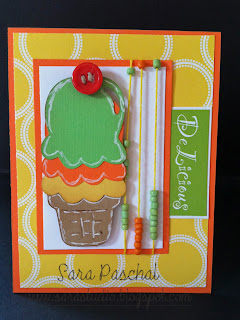
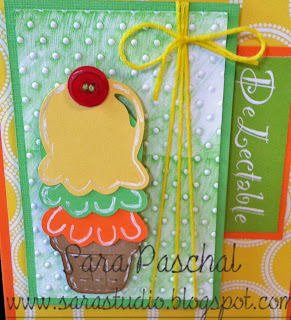
Moxie Fab Tuesday Trigger


I loved this so much I just had to play along.  When I first started in paper crafts this was my first choice of color family BOLD and BRIGHT.  You know how things go and have to switch up every now and again.  I go more for the neutral tones these days.

I woke up with an idea then I realized I sold this stamp set "Sweet Treats" from Stampin' Up! UGH!   If I could kick myself I would.  Note to self...this is why you hang on to everything you are going to need it!
So I perused through the Cricut cartridges and this cone was the closest match to my light bulb moment.

Card one...

Card two.  Yes that is hand beaded sprinkles.  I LOVE THIS ONE;)


Version 3...


Cosmo Cricket DeLovely
SU cardstock and ink
Cricut Doodlecharms Cartridge
Cricut Expressinon
Floss
Beads
ribbon unknown
Sewing needle and thread
PTI Buttons and twine
Cuttlebug embossing folder Swiss Dots
White Gel Pen

Happy Stamp Day.  May God Bless our Country and the World.

Friday, March 25, 2011

PTI Blog Hop Embroidery Floss

From Nichole on PTI website link to full rules found HERE...
Embroidery Floss
For the March Blog Hop we are challenging you to use embroidery floss in a fun and inventive way on
your project. This could include stitching, wrapping it around and tying it like ribbon, braiding, accenting
tags, embroidered patterns or anything else you can dream up! We look forward to seeing your
creations!


I won't be posting a Forgotten Friday Challenge this week.  
Feel free to play along with the block party challenge, link can be found
in the sidebar.

Here is my Creation...

All products PTI except for Floss and Ribbon.

 Embedded Floss Tutorial by Sara Paschal.
Products needed
Embroidery Floss
scrap pieces of acetate
spray adhesive
rolling pin
Die cut and cutter

Here is a quick video of the process...very simple indeed!


Directions...
Clip off 8" long pieces of floss.
Pull the threads apart.
Cut two pieces of acetate.
Lightly spray one piece with spray adhesive.
Pile on the threads and arrange how ever you like.
Spray the top of the piled threads with spray adhesive.
Place  the other piece of acetate
Take rolling pin and roll over sandwich making sure to get a good bond.
Die cut your acetate floss sandwich on a die cutter.
Ready to use on your project.

Happy Stamp Day!  May God bless our country and the world.

Thursday, March 24, 2011

(Imagine it) Vintage Notions!


I love to shop the MCC thrift shop anytime we are in Freeman.  One day I walked out of there with two massive goodie bags of Vintage Lace and Rick Rack.  I wanted to figure out a way to combine these on a card "LIKE" PTI's new Button Boutique Stamp set.  To avoid any  controversy  "input sigh here" I am not going to share my files.   However, I will show you how you can do this like you owned the stamp set and a Cricut Imagine.  Yep, that is right I have neither I made do with what I had and came up with the following...


What you will need to create your Imagine it Vintage Notions card...
Cricut Expression
Cricut Design Studio
Cricut Plantin SchoolBook Cartridge
Wide Format Printer 
SihouettenPeople font
BernhardFashion BT font
PTI Vintage Cream, Spring Rain and Blueberry Sky Cardstock
Piece of 12 by 12 scrapbook paper
Removable double sided tape
Vintage Rick Rack
Embroidery Floss
PTI Vintage Buttons and Satin Ribbon
Oval Punch Stampin' Up!
1" circle punch from Paper Shapers
Tim Holtz distress ink
Sponge
Cosmo Cricket Material Girl
Dimensional Foam Dots

Create the images you wish to print in a Word Processor Program.
Print Created image out on 12 by 12 scrapbook paper.
Create the .cut file you need in Cricut Design Studio to match your Created Image then cut it.
Use double stick tape to adhere the Cricut cut centered over the image you printed onto scrapbook paper.
Insert your layered scrapbook paper back into the printer.
Print your image.
This time your image will print onto your cricut cut.
Embellish as shown above.

How about the little tag showcasing the Rick Rack?  OMGoodness, I love it.  Was able to cut the vintage label up so I could make three creations with it.


About the FONT
I love this font.  Find myself using it constantly;)

Happy Stamp Day.  May God bless our country and the world.


Tuesday, March 22, 2011

Christian Paper Crafts Blog Hop

Today is the day!

Here is my Blog Hop Project.  This was fun to make and there are a lot of tiny details hidden in this beauty.  Everything from Copics, embossing, number of cuts in different colors and stitching all aid  in the dimension I was looking for. 
Then I found this DP in My Minds Eye Stella and Ruby Mabel Collection I had to use it.
  I was thinking about ripping it apart and using the dp for the tree. 
Obviously I let that idea pass for this card. 
However, I do plan on making another using it.
                                                                                                                   

Cut at 4"
One summer sunrise, cut out the bird
One Chartruse this is your piece to place your layers.
One in Kraft cut out the branches.
One in spring rain cut off the scallop edge.
One in spring rain on shadow for a base.

Spring Rain  base run through SU dots embossing plate, distress with Marina Mist Ink and highlight scallops with white gel pen.
Adhere green doily to blue blackout base with foam dots.
Use copics to shade the branch and place with Tombo Mono Multi Liquid Adhesive.
Adhere shaded bird with dimensional foam dots. 
Use a piece of scrap to create wing and black marker for the eye.
Distress the scallop spring rain with Marina Mist ink and draw on the stitch lines.
Place the scallop rings using dimensional foam dots.
Place the recollections flowers using glue dots.
Stamp your tag ad dp and sticker.
Place layers on card base, tie ribbon. 
Place sentiment tag using a glue dot.
Place the doily cut using glue dots.

Product list...
Cricut Expression
Cricut Cindy Loo Cartridge
ODBD He is Risen stamp set
Memento Tuxedo black dye ink
white gel pen
Copic markers
PTI ribbon and cardstock
SU marina mist ink and dots impression plate
My Minds Eye Stella and Ruby Mabel Collection DP
Recollections sticker cross and flowers
Tombo Multi Liquid Adhesive
foam dimensional dots


Happy Stamp Day!  May God Bless our Country and the World.


Monday, March 21, 2011

Holy Buckets O' Popcorn Batman!

                                             
Photobucket


This is the next Birthday Card I have made with a Circus Theme. 
The little popcorn looks sad doesn't he?  
Here are the cuts you will need to make...

Cut at 5 1/2" on the Cricut
Two with shift on Real Red cardstock
One with no shift on Stampers Select White
One with no shift on Lemon Tart

This size will fit in a standard A2 envelope.

Scor the red cuts at 1/2" from the top.
Adhere the red cuts at this 1/2" section only.  (This will allow your card to open from the bottom.)
Color the white popcorn with Copic yr12, y15 and y00.
Run the yellow popcorn through a dot embossing folder.
Distress with Summer Sunrise ink and a craft sponge.
Attach distress popcorn cut to popcorn bucket with dimensional foam dots.
Attach white popcorn bucket to red card base using Tombo Mono Multi Liquid Glue.

I computer generated a sentiment for the inside that reads...
"Just Poppin by to wish you a Happy Birthday!"
Punched out with Marvy Circle punch and attached to card.

Product list...
Cricut Expression
Cricut lite Carousel
SU real red cardstock and dot embossing folder.
PTI lemon tart, stamper select white cardstock.  summer sunrise ink.
Tombo Mono Multi Liquid Glue
Recollections Foam Dots
Scor Pal

Happy Stamp Day!  May God Bles our Country and the World.

Sunday, March 20, 2011

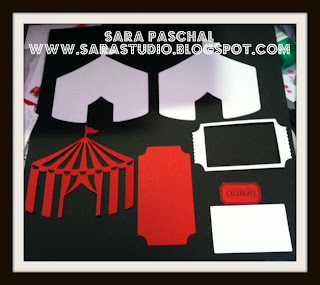
Three Ring Circus

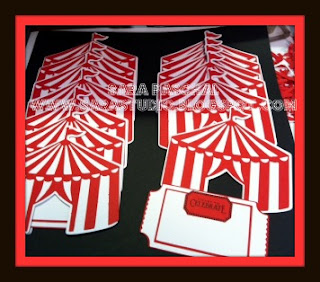
My Sister was over to craft with me on Saturday. We have such fun, the day gets away quickly. For Canton's after prom they have a tour of tables. Theme tables of eight are auctioned off as a fundraiser. So that is what we worked on Saturday her table. She asked me to come up with some fun Bday cards as a give away per table setting. Below you can see one creation. This was FUN to make and simple. I am all over Simplicity these days!


These cards will fit into a regular A2 envelope.
Below are the cut pieces you need per card, your cut sizes are as follows...
White cut at 4 1/4" with shift (You will need to cut two of these.)
Red Cut at 4 1/4" with no shift.
Red ticket cut at 2 1/4" with shift
White tag cut at 2 1/4" with no shift


To adhere your white big top cuts use Tombo Mono Multi Adhesive on the outer edges of one tent. DO NOT PUT GLUE ON THE BOTTOM OF BIG TOP! This will be where you insert your ticket.

Product list...
Cricut lite Carousel
Cricut Expression
PaperTrey Ink Just the Ticket stamp set, stamper's select white cardstock.
Memento Tuxedo Black ink
SU real red cardstock

Happy Stamp Day. May God Bless our Country and the World.

Friday, March 18, 2011

Forgotten Friday's... A New weekly Challenge

I was stalking my own blog looking back at early designs and see how far I have advanced since the creations were made.  While looking back I found sets, cards, techniques and designs that I loved but totally have forgotten about.  

Like the Challenge today using this post....


So today I challenge you to use your acrylic blocks in a totally different way.
   Use your blocks to create a fun background.


Here is mine...


Product list...
PTI cardstock
SU ink,stamp set, oval punch and ribbon
MM brads
CM corner rounder
Hole punch

Link Below so we can see your creation.


Ecclesiastes 4:9-10
Two are better than one,
because they have a good return for their labor;
 If either of them falls down,
one can help the other up.
But pity the one that falls
and has no one to pick them up.

Happy Stamp Day.  May God Bless our Country and the World.

Thursday, March 17, 2011

Cameo Sketch Appearance

How long has it been since I participated in a Sketch Challenge over on SCS.  A VERY LONG TIME.  Because this one was simple and I am all over that today I took the plunge. 
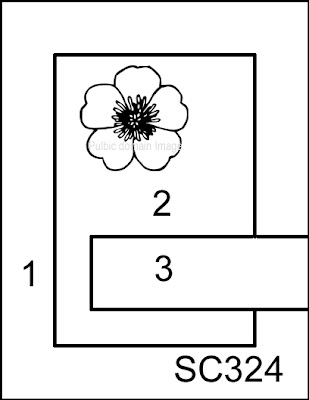
 Here is the sketch layout and you can take the
to find out more.


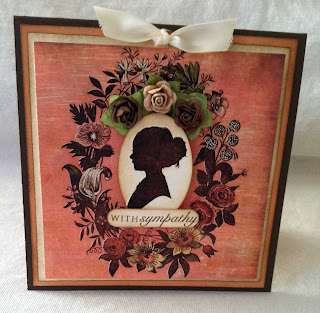
Here is one easy card.  And so beautiful I don't think I will be able to let it live anywhere else.
The cameo is from the Philippines.  Yes, the Philippines.  I ordered from Etsy.  Did not take her long to get me some and they are BEA-utiful!  Once again I find myself more ready to hoard them then to use them especially the black and white one.  LOVE IT!  The Cameo Bezel came from her as well.  I wanted to make it into a pin back however it totally destroyed the look and I did not like it.   Could always mail a pin back with the card and let them know they can remove it and adhere the back.  
Wait, didn't I say this was not going to leave the house?
This could easily be framed and turned into an art piece.  IRL the cameo and DP are really that divine.  


I did find a great page about resin casting.  You can check this link out.
I have to warn you I tried making my own and gave up.  You have to get the mix perfect, no air bubbles etc.  Frankly it drove me crazy and I decided not to waste more money or time on it.  I even had DH try he works with hardener mixing all the time with automotive paint. 
 Even Mr. Big Shot Himself could not do it right.  Ha Ha Ha;)
Not to mention this stuff stinks have to ventilate your workspace very well. 

 Make sure if you give it a go KEEP IT AWAY FROM CHILDREN and PETS.
If you try and  have good luck please share your secret.

And if you are like me don't have good luck here is a link to Cameo's on Etsy.


Product list...
Cameo
Bezel
Websters Pages Once upon a springtime
PTI vintage cream and ripe avocado
Memento tuxedo black ink
SU stamp set
Glue Dots

Happy Stamp Day.  May God bless our Country and the World.

Wednesday, March 16, 2011

The Good and the Bad

This is the second post for today scroll down to see my creative post it is totally twisted;)

We are back from Donna's Dr. appointment with Dr. McKenzie.  He gave us the good and the bad news and explained in detail what we were looking at and what was going on.
So here it is...

Donna's Thoracic Vertebrae #6 is healed;) AMEN for that!  I have been in a panic since last week.    He explained how the tech reading the MRI misread  what was happening to the vertebrae.  What that reason is I can't remember.  Her  costovertebral junction (where the vertebrae attach to the ribs is also damaged.)  So at this fracture level she has lost 20% of the disc space.  For now there is no narrowing around the nerves and her spine is stable.  There is all ready arthritis forming in all of the fractured spaces.  I don't know the numbers but her fractures ran all the way through the thoracic and lumbar spine.
She will be taking Physical Therapy three days a week.  The good news here is she can go to Marion to the Nursing Home where she works. 
Goes back to Dr. McKenzie  for a follow up in 30 days.
She will also be seeing the Athletic Trainer and Dr. Smith for her knee tracking problem.  
Surgery may be needed to move the tendon and give her knee more stability.  
For now she continues her PT and wears a brace.

Dr. McKenzie stated that she will never be pain free in her back again.  As the arthritis forms and the discs degenerate the pain increases.  (Discs do not heal.)    I would joyfully take on her pain if it would mean our Daughter would have a wonderful healthy life.  Now she is doomed to hardships that are unfathomable to those that don't suffer from back pain.  I know first hand what hardships are  involved and her road is not going to be easy and that is really making me sad:(

Best place on the net to find out more on the spine...

Our home away from home now seems to be the Orthopedic Institute.
Dr. McKenzie, Dr Smith 
Trainers Norm Stone, Aaron Conklin
have all done wonderful things for us to date and I recommend their services;)

1 Peter 5:10 
" But the God of all grace, ... after that ye have suffered a while, make you perfect, stablish, strengthen, settle you"


A new TWIST for Spring

I love, love, LOVE this creation.  One of my all time Favorites.  The new TWIST for Spring is the addition of the rolled paper flower center.  Pretty cool or what?  
Below I will show you the changes to make to achieve this look.  I am so happy with the way it resembles the flower on the DP.  


Grunge flower video...


Here you can see the pieces I used from the tutorial above and the addition of the rolled spiral flower.

I use glue dots to adhere my pieces after they are adhered very well I will trim off the back of the cone piece that fits in the center of flower 1.  By doing this the flower will sit flat against the card.

Product list...
Cricut Expression
Walk in my Garden Cartridge
Websters Pages once upon a springtime
SU lace and pear pizazz cardstock
PTI mellon berry cardstock
Shape scissors
dimensional dots
Silk flowers are from Hobby Lobby
small scallop scissors 
White Gel Pen


The wilderness and the solitary place shall be glad for them; and the desert shall rejoice, and blossom as the rose.  Isaiah 35:1

Happy Stamp Day.  May God Bless our Country and the World.

Tuesday, March 15, 2011

Sympathy for the Wenatchee Venom


I don't do square cards much just for the fact I donate most of my creations to the Nursing Home or the Calvary Youth.  When you start having odd shapes with bulky mail the price of postage increases and that is confusing .  So this I will keep for my own private stash.  My stash is VERY LOW after the Youth Group was done with sales.  What a wonderful situation to be in.

Your continued prayers for Donna and our family are greatly appreciated.  We see Dr. McKenzie in the AM about her burst fracture that is not healing.  This fracture is in the Thoracic spine close to the heart and lungs.  Usually surgery here is too risky and is not done.  Because of her age they are rethinking this.  The other option is back into the turtle shell for another 6 weeks.  


Product list...
Basic Grey Curio dp and rub-ons
SU oval and word window punches
PTI cardstock, ink and ribbon
Recollections Flowers


DH and I had a date night and went to the Home Opener Storm Game.  Yes, they won.  Served up another butt kicking this time to the Wenatchee Venom.  When we picked up our season tickets all Jessica wanted was a photo with the Lightning Girls.  So here she is....Just you wait one day she will be out there.  (And I can assure you she will be able to find the 25 yard line!  Inside joke, had to be there for that one;)  She does not like to go gets too loud for her and if Blizzard gets with in 25 feet  she freaks out.  This is the same child who wants to go to Disney World.  I know!

You can find out more from the Sioux Falls Storm Here.


Happy Stamp Day.  May God Bless our country and the world.

Monday, March 14, 2011

Wishing... I would have stopped!


This was a fun card to create.  However, I think it may be over kill.  A few less buttons?  No bling?  I will have to try this one again see what changes get made.  Love the new collection of  BasicGrey Rub-ons.  They went on real easy. (Some out there don't like coming off the carrier sheet.)

Product list...
BasicGrey Curio 
PaperTrey Ink Mat Stack 1, Text Style background, felt, flower dies, buttons, ribbon, cardstock and twine.
Sizzix scallop card die
SU oval punch, cardstock and ink
recollections bling
Head Pin

Happy Stamp Day.  God Bless.

Sunday, March 13, 2011

Celebrate Every Day

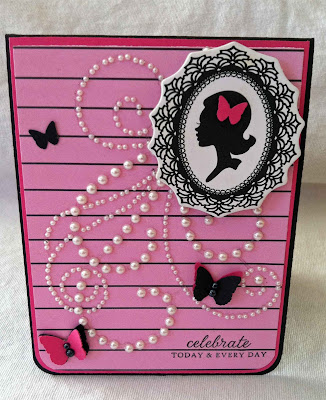
Here is another Beauty using Teresa Collins Posh collection.  

I love this little sentiment stamp from PaperTrey it comes from?  OMGOONESS, I have to clean up to find out what set this came out of..  I really need to write things down so much easier then picking up my creative mess.  Okay, I found it.  The sentiment comes from PTI's Autumn Abundance stamp set;)  

Jessica is really loving this collection she is waiting for scraps so she can play. 

1 Thessalonians 5:16-18
Be joyful always; pray continually, give thanks in all circumstances, 
for this is God's will for you in Christ Jesus. 


Everyone needs to celebrate Today and Everyday!

Product list...
Teresa Collins Posh DP collection
PTI Autumn Abundance
Cardstock basic black and Raspberry Fizz
Ink Memento Tuxedo Black
Prima Pearl Swirls
MS butterfly punch
Bo Bunny Bling
Dimensional Dots
Glue Dots

Happy Stamp Day!  God Bless.

Saturday, March 12, 2011

Rock...PAPER...Scissors


Paper Covers rock, wood, glass, chipboard and canvas.   Scissors cuts paper.   Sorry, I just had to!  LOL!  
However, around here Sara has paper COVERED!
So much so DH had a total fit when I went to order from Winter CHA.  One quick walk uptown solved this battle.  His little car hobby eclipses my creative obsession with paper.
Below I will show you how I organize and store this colorful investment.

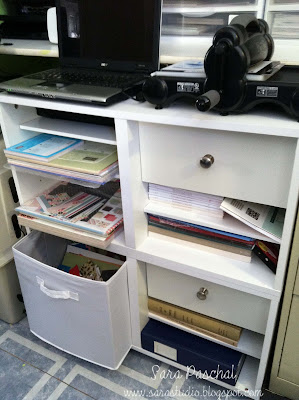
Here is the view of my storage from my new sitting area. 


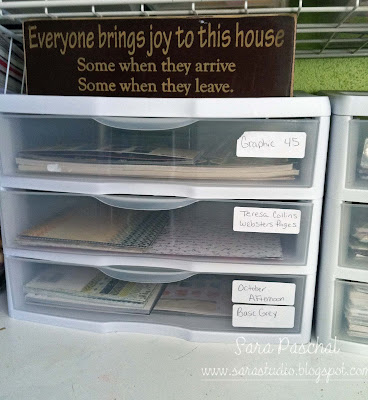
These three drawer plastic storage cubes are perfect for 12 by 12 DP.  I found mine at Wal-Mart.  I use two of them and could use more;)  I have the main Companies I use here for now.  Yes, I need two drawers just for BasicGrey.  Can you say addicted?  So if you are asking yourself what my favorite DP company is now you know.  Can't beat BasicGrey!  
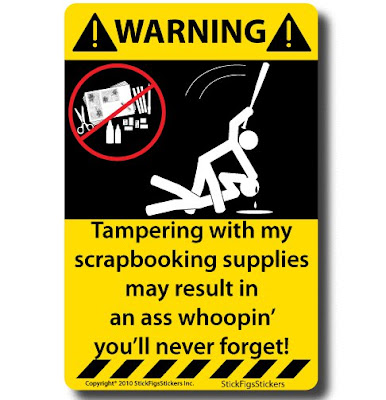
How about the sign?  Gotta love it!


This is the next sign I need to get...


Below is a set of storage cubes Wal-Mart had on clearance after Back To School.  Here I keep my Stampin' Up DP.  Larger paper stacks, papertrey ink dp and extra cardstock.
The little cubby is a great place to toss scraps "Crap" til it can be organized. Yes, I said organized crap.  Take this link to see how I sort the small sCRAPs.  Jessica loves to dig in here and make her own creations.


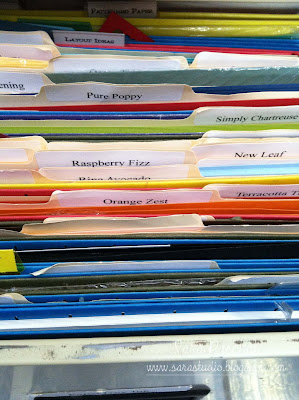
I have a two drawer file cabinet that holds most of my cardstock.  The extra packages I purchase sit in the previous cubby til I need them.  SU is in the top drawer and PTI sits on the bottom.  I actually use PTI cardstock the most of any company. They are my FAVORITE when it comes to cardstock!  Hands down, no contest PaperTrey. This drawer is the easiest to reach and if I leave the drawer open the entire thing won't crash forward.  Oh, yes!  Took me a few times of that rodeo before I changed things up.

I have labels made for both companies color collections.  I do keep them in order that works best for me.  **I have the colors I use most in the front.  
**Another tip when I get the basics in I take and entire package cut and score my card bases.  


I don't mess around when I order I go for the big packs saves money in the end;)

Well there you have it.  Now you know how I store my Paper.
To find out my top tool pics click the link HERE.

Happy Stamp Day.  God Bless!