Tuesday, July 31, 2007

Artfully Asian meets Fabrino


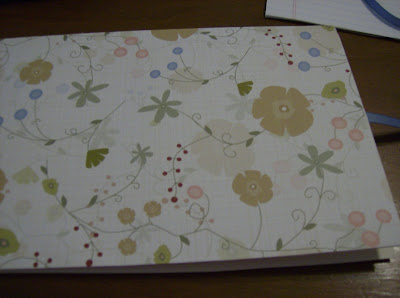
I was so in love with a card my DSS "Sherrie" sent me this round on SCS DSS (Split Coast Stampers, Divine Secret Siblings) I just had to case it. She also sent me some of the Fabrino papers that her card was stamped on, I had never used them before. (They are wonderful, Thank you Sherrie for a great round, many wonderful ideas and lots of Awesome Ribbon.)
Just had to borrow the stamp set from a friend so I could make the magic happen, (Thank you Barb)!
It didn't take long and I had some glorious cards. Sherrie used organdy ribbon, I have none so I used the GG she sent, she also had some bling on her card using very small rhinestones on each of the flowers, I did some of my cards this way but not all and she had a very small sentiment stamp on hers that said friend, I also made some that way and left some plain.
blog candy winner

I drew the winner yesterday afternoon when I logged on my counter was at 3032 hits, WOW! I am glad you enjoyed the tutorial with the 2 pocket folder, they are fun to make and great little organizers I love all of your ideas for them.
And the winner is....

True Random Number ServiceRandom Integer Generator
Here are your random numbers:
3
Timestamp: 2007-07-30 22:58:37 IST


The winner is #3 bonniski, please email me your mailing address. Thank you!

bonniski said...
Hi Sara. Barb was trying to explain to me last night how to do this. I followed until it got to the vee cut-out. Your tutorial makes it much easier to understand. I'm thinking I should make one for the cards my sister Barb is supposed to be sending me once a week! (Hope Barb reads this) This looks like a fun project. Bonnie

July 27, 2007 1:28 PM

I won, I won!

Ok, so who took the link to Spazzgirl and entered her contest that I posted on Sunday? You should have because look at what I won!!!! Can't wait for the mailman to come, I think I am going to set up my chair at the end of the driveway. Wow!! Thank you, thank you and thanks again!

Big Prize:
* Simple Scrapbooks, Aug 2007
* Cardmaker Magazine
* Stamp from Hero Arts
* Stamps from Inkadinkadoo
* Maya Road Chipboard Pieces
* Diecuts and strips from Paper House
* Creative Cafe Project recipes
* Big Flower from Imaginescence
* Journaling blocks from Fontwerks
* Heidi Swapp Big Flowers
* Heidi Swapp Lipshine lipgloss
* Lickety splits sticker strips
* Photo gems and stickers from Paperhouse
* Catalogs from Gelatins and Inkadinkadoo
* Pencils and Pens from various booths
* Eyelets and brads from the Eyelet Outlet
* Karen Foster Scraparatus bag


You can find the link to Spazzgirl on the right hand side of my site she always is fun and has wonderful ideas.

Monday, July 30, 2007

Still time to comment for blog candy

Remember to comment for blog candy, the counter is getting close! Follow this link to leave a comment on the correct post to be entered. Blog Candy

Dog Gone Cute!


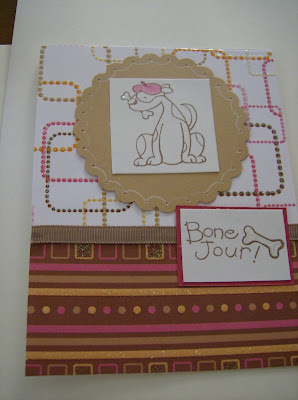
My DD asked me the other night if we could stamp some cards, so we broke out my WRAK Ruff Day images and went to town. These three cards were created by my 10 and 12 yr old girls. Didn't they do a great job? The paper used was from the glitter stack by DCWV and SU card stock. The goal of my DD is to get them to the county fair in a couple of weeks.

Sunday, July 29, 2007

More blog candy here

Take the above link to spazzgirldaily and see some new items of CHA and enter for a chance to win some great stuff.

Friday, July 27, 2007

Time for Blog Candy!!!

The tutorial Below shows you how to make a two pocket keeper out of an everyday school 2 pocket folder. To win this Blog candy comment here on this post how you would use your keeper. I will randomly draw a winner when my counter reaches 3000 hits (or so) and the winner will get a filled Keeper. (The filling is a secret, Ha, ha, ha.)

2 pocket folder keeper

I pulled out a project yesterday and did a redo of it for some storage of my Wish Rak images before they gained control of my work space. When I was taught how to make this type of keeper it was used to store the Christmas Cards you received that year then you would put the year on the outside of the folder. (cute idea!) I took the folder down the street to show my Friend Barb and she came up with a few easier ways to make it and a few more ideas of use so (thanks Barb).

Purchase some two pocket folders (You can get some great deals this time of year and this project makes a great gift).


Step 1 Open folder

Step 2 fold the open folder down so the top meets the bottom of the pocket where it is closed.


Step 3 Measure your triangle to be cut out. Make a mark 1 1/2" out on either side of the pocket fold line. Next take your straight edge and place it on the mark and line it up to the fold line you created when you folded the top down and make a line. Do this on both sides so you get a triangle.


Step 4 cut out your triangle


Now you have two flaps that move independently to cover your pockets


Step 5 is to fold down your flaps and close up the folder. You are ready to tape on the ribbon of your choice to the front and back cover. Make sure you leave about 6 inches of ribbon on either side so you can tie the folder closed.


Step 6 (adhesive to DP) I used my Xyron to put adhesive on the back of the paper I chose and at the same time I ran the paper through that I was going to die cut my letters on. (Can't waste anything right!) You can use the adhesive of your choice if you do not have access to a Xyron make sure you get it all the way around all sides and into the corners so you get a good hold.


Step 7 take your adhesive backed DP and cover the front and back covers of the folder, your ribbon is now secure between the DP and the folder.


Step 8 now you can decorate the front cover, I took the Sizzix and since this folder was for my Wish Rak Images I put WRAK on the cover in Mellow Moss and backed it on More Mustard.


Step 9 fill up your new keeper


You could go farther with your folder and stamp or DP the inside, if I was giving a gift I would do so but since this one was for personal everyday use I left the inside white. Have fun making these, I do! Let me see what you can do with these I am thinking of a contest.

Thursday, July 26, 2007

Glitter Tent Topper Card


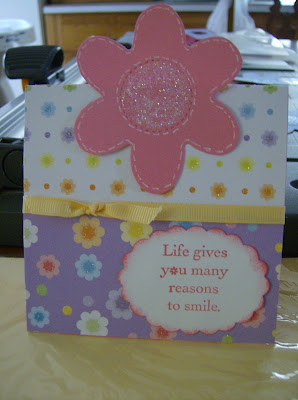
Wow how do I sparkle lately. All of these glitter window cards and now I am working on some swap cards for All that Glitters a similar version to this one will be my swap card but the color will be green and saffron. For this card I used Glitter paper from DCWV and the sizzix to make the flower die cut. In the center of the large flower I used Stickles then I took a white gel pen and added some extra flair to the flower. This Card used the SC over on Splitcoast for this week it is called a Tent Topper Card. The card measures the normal size when you ad the top so it fits into a regular invitation envie.

Wednesday, July 25, 2007

Love and Light of Christ


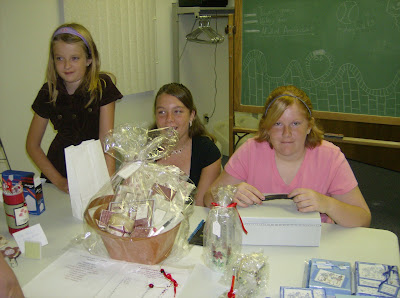
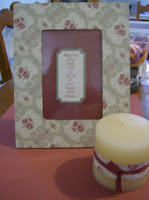
I just love this Recollections Paper from SU and am sad that it is now gone but it was for a great cause. The day before we left for the Youth trip I donated craft items to the church for the kids to sell to benefit them for the trip. In the end over $150.00 was raised and all of it given to the kids. This paid for Twins tickets, $5.00 at the game for a treat, and bottled water for the trip. I was in shock to see things just flying off the card rack and table, lots of beaded pens, magnets, cards etc. The gift basket in the center of the table was included in a silent auction and I called it the Love and Light gift basket because of the Sentiment stamp, "May the Love and Light of Christ Fill Your Heart and Home." such a great saying for this project. The gift basket included, 6 cards with envies, magnet, beaded pen and lip balm, photo frame, photo book, comp notebook, candle, smaller notebook and some note holders made with tiles.

Tuesday, July 24, 2007

You Make Me Smile Birthday

Here is another glitter window, I am stuck on these lately, they are fun to make. I used yo you yellow and basic black. I used two different sizes of square punches to get a matted window effect. This set was retired this year but it is a fave of mine and it makes cute kid cards. So these cards are off to a Cute Card For Kids Swap, I can't wait to see what I get back. You can scroll down to see how a glitter window is made or follow this link Glitter Window.

Summer Bummer continued

Here is my DD on our trip She was feeling very left out while everyone was playing baseball, she so loves sports. We took her to the Specialist again on Monday and She is out of the immobilizing brace and now has to wear a softer elastic brace when she is active. He did break her heart when he said no fall sports, Basketball or Volleyball this year (She did start to cry, we both felt bad but the Dr. was good he pulled her back for a bit.) She did enjoy the trip and was glad we went, I was a bad Mom and let her out of the brace while we were at Valleyfair, I told her after her last visit if She wears it like the Dr. told her 24-7 I would let her take it off for the time we were there. She managed to ride all of the large roller coasters but for 1 and she went on the Power Tower as well, as for me I told the kids they could find me floating on the Lazy River or the Imax. All in all it was a fun filled four days and I am just now feeling like I am coming back to life, I was so very tired when we returned. Today was the first day in over a week that I made a card and they are going off to a swap at the end of the week. I am glad to be back and I thank all of you who have sent a card to my DD.
Thanks!

Saturday, July 21, 2007

Archiver's inside Mall of America

This is where I spent most of my time as the Kids shopped around the mall, I told them they could find me in the back work space. I had time to cut and punch some paper so in the next few days I will show you my glitter snowman card a variation on the one posted previously. I was so tired yesterday I spent most of it sleeping. Now today I am working on a photo slide show to show at Church tomorrow. I have it done just need to figure out some music for it, in this I am not very adept, I need to find some software that changes format of downloads so my program will take it, did you get that? Any ideas of some good software please email me.

Friday, July 20, 2007

2007 Youth Trip to MN Group Photo

Honey, I am home! This is a photo of us on the Youth Trip to MN, the last day. Everyone had a wonderful time and only one small injury. I will be getting busy soon and getting you updated for now I think I am going to find my bed back!

Thursday, July 12, 2007

Glitter Window Christmas

First off I can't take credit for this card, it was sent to me by a Demo for inspiration last season. The stamp set used is from SU "Cold Play" the red is real red not sure of the blue. I am going to work on this layout and use the CB embossing snowflake folder for our Christmas card. (I love the glitter window!)
Here is how you can make a glitter window...

Cut Card Stock to size you need for image
Punch a shape in the card stock where you want your image to be (punch used here is circle)
place packing tape on the back of the card stock
Sprinkle fine glitter on the front of the tape and rub it in (you are going to twinkle like it is Christmas when you are done)!
Stamp your image on Card stock and mount it behind your glitter window
Assemble you card
These are fun to make, enjoy!

I will post my finished product when I get all of my supplies in, I have run myself short on many essentials, that stinks.
Not sure how much time I will have to post in the next few days, I am getting ready to leave on a trip with the Church Youth to MN. (10, 11-13 year olds) we are going to the Mall of America, See a Twins game and Valley Fair. And probably when I get home a trip to the DR..


Wednesday, July 11, 2007

Ready for Christmas?


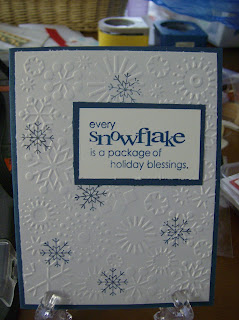
I purchased the CB snowflake embossing folder over the weekend. I really want to use this on our Christmas Cards this year. I was just playing around to get some ideas and I thought this would make a great winter thank you card. I used Not Quite Navy C.S. and ink, the white paper is shimmery, looks great IRL. The sentiment is by Penny Black, I just love it! Not sure of the little snow flake but isn't he cute!
I learned over the weekend that the STAMP GARDEN in Sioux Falls, will take Hobby Lobby and Michaels coupons on Wednesdays. (How cool is that!) Also for the month of July all Christmas stamps are half off, yes you heard me right run don't walk to the Stamp Garden and check it out.

Tuesday, July 10, 2007

A smimple card

I was caught cleaning up my stamp area again and I found some things I have never used or had not used in a long time and I thought they looked lonely. This is what I came up with..
I took white C.C. and embossed it with Divine swirls, then I cut a strip of blue from SS and mounted some self adhesive bling stars on the strip. Next I found this saying from the Quick and Cute SU set and stamped it in Brilliant blue and mounted it on a scallop blue square. Simple card yet elegant it is going to be sent to a returning SD hero, Corey Briest! He was badly injured in the Iraq war and is just now returning to SD and his family after recovering in California for over a year. So a great big WELCOME HOME to Corey and a Huge THANK YOU to all of our service men fighting for our freedoms.

Monday, July 9, 2007

What were they thinking??

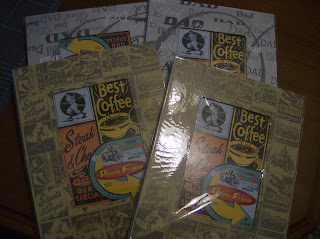
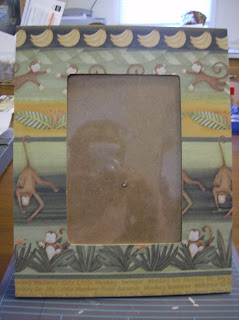
Went shopping on Saturday and found these frames in Target's Dollar spot, they are remnants of Father's Day Gifts and I asked myself, "What were they thinking"? I don't think I would ever make this purchase as a gift for my Father or Husband, but I will give them an alteration. This is my tutorial how to cover up these frames from Target's Dollar spot... (by the way in the end each frame cost me fifty cents.)
These are the products I used... frame from the dollar spot, DP from Scatterjoy, self healing cutting mat and exacto knife, fiscars paper trimmer and Xyron. Simple!

First thing to do is measure your frame.


Next cut your DP to the size of your frame plus add 1/4 inch to every side.


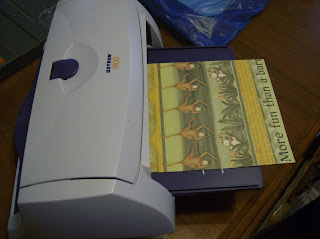
Then you run the paper that you have cut to size through the Xyron.


Remove protective backing from you DP and lay the DP face down on your self healing cutting mat. Next center your frame over the DP after it is centered press down to adhere. (Be careful here, you do not get a second chance with this adhesive.)


Take you exacto knife and trim around all of the edges of the frame and the center cut out. I saved the inner piece and immediately placed it on card stock.


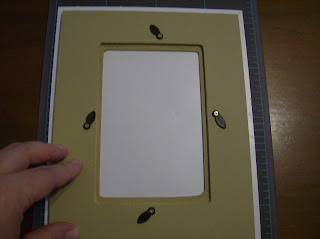
When you are finished this is what you will have, an altered photo frame.


Sunday, July 8, 2007

More info on Paper Trey Inc. Card Swap BUMPED TO THE TOP FOR A REPOST

Here is more info on my first swap, if you wish to join please email me so I can get you signed up. Thank you for playing....


Name of Swap: Paper Trey Inc. Card Swap
(You can see the stamps to use by following the above link)


Description: Any occasion, any color combination, any technique you wish to use. Please make full cards. Please use at least 2 layers of paper and at least 1 embellishment. You can stamp the inside of the card if you wish or you can just leave it blank, it's up to you.

Quantity: 5+1 You can sign up for more than one spot, just please make 2 different sets of cards. I will be swapping 5 different cards, you will not get one of yours back so make sure to make an extra for yourself. The plus 1 is for the hostess. You will send in 6 cards and get 5 different ones back.Vendor

Products: Please use only Paper Trey Inc. Stamps

Deadlines: Due in my hands by August 23. You can sign up as many times as you would like. If you sign up and find out that you can't make the deadline please let me know ASAP so I can fill your spot. I will mail out by Sept 1.

Questions: Leave a comment on this post or email me at paschal.sara@gmail.com

Mailing Instructions: Packaging: Place your swap cards in a zip lock bag to waterproof and protect your work. Write your real name, SCS name and the swap name on a piece of paper and put it in the bag for identification.

Swap Return: Place bag inside a self addressed stamped envelope for return mail purposes. The amount of postage on your SASE should be the same amount that it takes to mail to the swap hostess. Please Remember no metered strips...they are only good for the day you purchase them, please use stamps on your return envelope! Please include 2 extra stamps in your bag to cover any extra postage, they will be returned to you if I don't use them. Place your SASE inside your mailing envelope and address it to:

Sara Paschal
151 North Street East
Monroe, SD 57047

I will add more spots as needed.

Saturday, July 7, 2007

I have been tagged

I got tagged today by Wanda at MyCreative Corner And by Aimee.

List Seven Random things about yourself:
1. Green is my FAVE color.
2. I love to swim, and yes my hair turns green from the chlorine.
3. I hate to watch movies more than once, unless Ben Affleck is in it.
4. I played in the water hose the first day of kindergarten in hopes I would not have to go to school. (Didn't work!)
5. I like the fall weather.
6. I like to be organized.
7. I was once pulled over by the police for riding my Bicycle through a stop sign.

Friday, July 6, 2007

And the winner is....

Tami who posted...
love this project! Is that a small notebook on there? love the colors!
June 29, 2007 5:46 PM

Please email me Tami with your mailing address.
Thank you to all who played, look for more blog candy coming soon.

Thank you Tami G. for getting me your mailing address, I will get your magnet sent on Saturday.

Hip to be Square


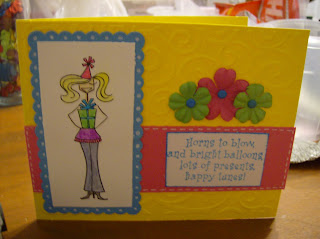
I played with more Bella's yesterday. I like this one as well, she was not that bad to color. I used SU markers and chalks. The background is yo yo yellow and embossed with the CB folder Divine Swirls. The strip in the middle is pink passion, sure does not show up well in the photo. This was doodled with stitching using the Gel pen. The birthday saying is from SU's Birthday Greetings and it is stamped with Tempting Turquoise and mounted on the same C.S.. Again I used two square scallop punches to make her mat then I doodled dots with my white Gelly Roll pen. The flowers are Primas and the brads in the center are from Hobby Lobby.

Thursday, July 5, 2007

Fun with Bella


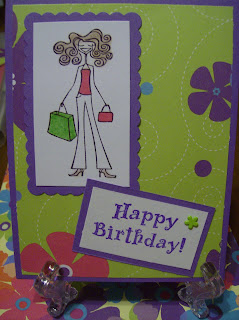
I made a wish for some Bella images and I have been getting some in the mail. This is one I love and have had a ton of fun playing with. I do not do much coloring when I stamp and at first had a really tough time with the bella's then I received this one, very simple to color and I like the fact she was shopping, cute! For her background I punched out to Giga scallop squares to make a rectangle with the darker paper or patterned paper you don't see the line if you use lighter paper you can cover the line up with ribbon. The Dec paper is from Hobby Lobby along with the flower brads. I used lovely lilac for the card and the stamping of the sentiment. I made 4 of each of these colors for a cool set: lovely lilac, pink passion, green galore and tempting turquoise.

Wednesday, July 4, 2007

Tuesday, July 3, 2007

Cool Cat Garden Block Party


Thanks to the Wish Rak Group on SCS I have some Cool Cat images to play with today for the color Challenge. The colors were Pretty in pink, old olive and cho. chip. I was inspired by Papermoon's color blocking card in the gallery and this is the card I came up with for the challenge.
I also played around with this card today using different colors from color combos at scraptitude.

Monday, July 2, 2007

Finished a flash back card for someone special

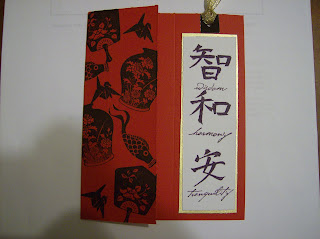
A few years ago my Sister got this set, I think it is her very least favorite set, so now I have it. I was cleaning up cards last week and saw that I needed to finish this card I had five ready to go all cut and just waiting for some ink. So, as a joke to my Sister to get her feeling better I finished up the cards and mailed her one told her to get better soon so she could come over and stamp with us. I know not funny but I actually like the card, not my first stamp choice set either but it made a nice card. Real Red, Black, gold and white were the colors used, the right side of the card is Scored so it can be removed for a bookmark.

Sunday, July 1, 2007

Monroe Park Photos


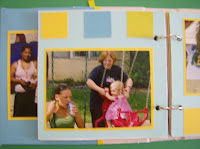
This weekend I am trying to get the Monroe Park photos finished and handed out to those who helped with the project. Here are some photos of the scrapbook I made that is going to Coty's Mother along with a DVD and some JPEG's. You can tell I chose a very simple layout that used a couple of punches and four colors of Card Stock. The Card Stock was textured and look really good when I sanded the edges of the pages. Well I am off to finish burning some DVD's have a great day.