Wednesday, December 30, 2009

A Look Back 2009 Part 2

So here we have the last 6 months of 2009, remember...
1) Use search function in sidebar to find older posts
2) There is a Download link to all my Free DS .cut files under blog header
3) I have proudly posted my favorite links and badges in my sidebars so many great ideas to be found.
4) If you have not signed up for my feed yet what a great way to begin 2010, you will get an email when I update the blog.

Enjoy, have a Happy New Year!
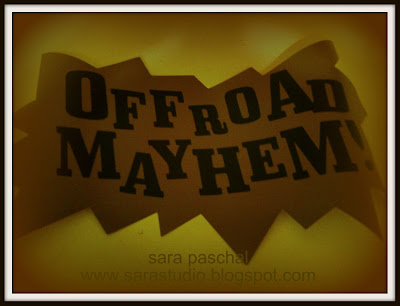
Off Road Mayhem part 2 December 17th
So hard to pick one fave for December I have been hard at it making Christmas gifts for my family but in the end the project I worked on for my Nephew took the top spot. I think based on the fact that I had a great time spraying the shirt is why it won and the second that I used what normally would have been trash (the liner tape for the vinyl) and figured out a way to use it.


November 9th I worked on my blog skin for the holiday using a download I purchased from Faith Sisters Store. This has been my favorite blog look of all time I had a wonderful year with Faith Sisters they have such a beautiful site and many free downloads.

October came and introduced me to digital stamps the one on this card was from MFT. I am not a big color girl on cards I was happy when I was able to PAINT this image and then print it out.
Sun October 4th WCMD challenge card


September 8th In my Cozy Chair
In August I designed this birdhouse cut on cricut ds to match the birdhouse in the new SU catalog. There is the free .cut file download you can find all my .cut files in the link under blog header. It also went with one of my favorite stamp sets released this past year PTI's Everyday Button Bits LOVE IT!
August 13 a tweet for you


Tuesday, December 29, 2009

A Look Back into 2009

WOW, 2009 is quickly coming to a close and that means in March 2010 I have been blogging my crafty creations for THREE years that is HUGE! There are many great ideas you can find in my Creative Adventures and many posts about random things. I am getting close to hitting my storage limit and plan on going back and deleting some random posts through that journey I thought about closing out the blog year by highlighting my fave post for 2009 below you will see my faves for the first 6 months of 2009 but, first I want to share with you my top 5 tools that helped me in this adventure.

1) Cricut Expression
2) Cricut Design Studio
3) PapertreyInk.com (there is not much here that I don't like;)
4) Scor-Pal
5) SU Bella Rose DP pack

Now onto my monthly picks...

July 13 CAS swap card This was my swap card and it made use of my Lil Bloomers I had such fun creating these this past year. July also meant my DH started treatment to lower his cholesterol and triglycerides levels. Proud to report the first 6 months he has made awesome progress and is on the road to feeling MUCH better.


June 2 flower pot shape card I taught myself how to crochet flowers in 2009 in the process taught our DD L and now she enjoys making crocheted items. She took on a huge project making scarfs for Christmas gifts.


Ice Cream cone treat bag May 22 One of my Cricut DS projects, I am addicted to this program and LOVE making cut files. You can download my .cut files for free take the link under blog header and you are on your way.


April 3 2009I found JenC in 2009 she was very helpful on my Journey with Cricut and Cricut DS this is one of her .cut files I used it to make these cute bags for Easter Gifts.


52 sketches Week 8 and Week 9 This site was great for me and got me into doing more scrapbooking (my first true crafty love). I enjoyed taking pics of Little J and scrapping them for her. And you my readers know 2009 was the year of the digi camera. From broken cameras to new cameras that stunk to my friend Wanda creator of My Creative Corner that actually sent me the camera that I now use. Thanks again Wanda!


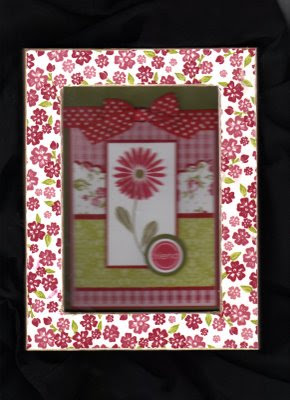
PTI blog hop Feb 25thA PTI blog hop project later won second place at the county fair (I was crooked on some cuts). I used my fave dp pack on this creation.


OCC Sketch Card Jan 30th 2009 Made use of the Bella Rose DP pack on this creation also along with a sketch from Our Creative Corner.


Well that is the first 6 months of 2009, what are your faves from the past year?


Monday, December 28, 2009

12 Months of Cooper

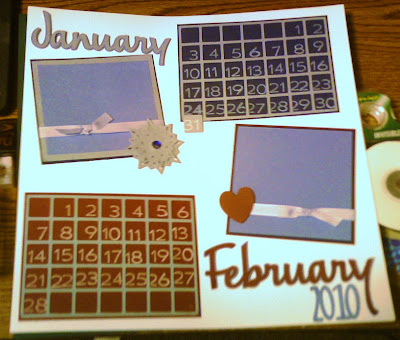
This is a gift I have been working on for my Sister the new Grandma, LOL! (I should not laugh so hard that makes me a GREAT Aunt again.) Anyhow I made a 2010 calendar for her that she can put up at work every month she will have a new pic of cooper to display.

Below you see January and February...


Product list...
Cricut Expression
Cricut Designers Calendar cartridge
PTI Fresh Alphabet, fresh snow ink
SU ribbon and card stock
Bling

The calendar grid is cut at 4" perfect fit for the PTI Fresh Alpha set.
The Months are cut at 2"
Photo mats measure around 4" by 5"
By keeping all the cuts standard and the embellishments simple this came together really quickly. When the year is over she will have 6 completed scrapbook pages ready to go into her album.

Sunday, December 27, 2009

More SNOW?

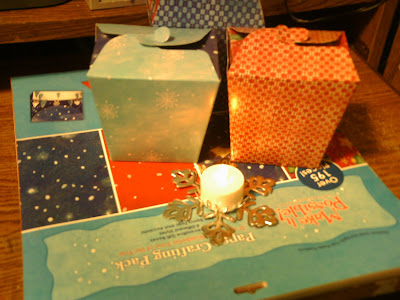
This snow is the best stuff it was made by my friend Wanda over at My Creative Corner.
She used her Big Shot and some aluminum left overs to create this wonderful candle holder project, I had to order some from her a few months back they are small gifts for my Sisters and Niece.


Now lets get down to business the paper pack that my snowflake sits on was purchased over two years ago at the Hobby Lobby after Christmas sales for 75 percent off! I totally got the purchase of a lifetime with this it has tons of great pieces to package up little gifts in and the snowflakes were perfect for the takeout boxes. Get out this weekend and shop some of those wonderful after Christmas sales!


Saturday, December 26, 2009

Christmas Blizzard 2009

STILL HERE?? Woke up this am to more snow and blowing snow, the Christmas Blizzard of 2009 is set to continue on through midday. Our family Christmas has been postponed til New Years the kids are bummed out but look they have plenty to do, LOL! I think (did not get up early enough for the news report this am) the snow total is somewhere around 13 inches. The county road you see in front of the girls has only been plowed twice in four days there were drifts on it in town over 4 to 5 feet tall. Bear is having a total blast bounding through the white stuff.


Friday, December 25, 2009

Merry Christmas


Wishing all of you a very Merry Christmas!

Wednesday, December 23, 2009

Highlight A Place For My Cards

When I first started blogging I would highlight one of my fave cards from SCS weekly. I spend so much time in my cozy chair blurffing that I am going to start sharing with you in more detail some of my favorite blogs. Today I am going to take you on a Journey to A Place for My Cards Jeannie Phillips is the author of this blog and a fellow Cricuteer. I love to see her creative cards and I have even CASED a few of them. The Elf post she has up right now is so very CUTE! Jeannie has been in the Cricut Chirp multiple times, you can sign up to receive the chirp in your email when you visit here

She also produces a blog where you can win a free card you can find that here. Here Etsy store can be found here.

So grab a cup of coffee and check out Jeannie she is one creative lady and inspires me daily.

Below is my CASE card, you can find Jeannie's inspiration creation here. I also have a free .cut file posted under my blog header so you can recreate this yourself.

Monday, December 21, 2009

Need one of These?

Getting snow where you are? We have a storm headed our way for Wed and Thurs of course heavy snow for then. Don't have plans to travel until Saturday so we are good to go there worried about the church Christmas program the girls have been singing their little hearts out hopefully the show will go on.
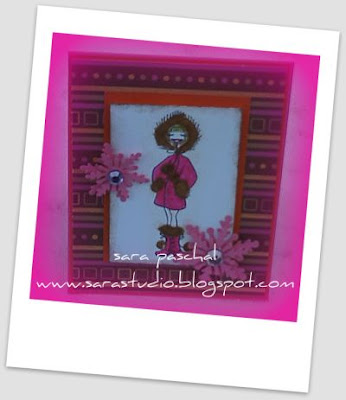
I won some blog candy from Amy at Scrappingmommy.com in it she had some bella images I totally love this parka one and I colored her to match our DD's parka. Had some trouble with the flocking, I have come to the conclusion that this stuff just is not for me.


Product list...
DCWV glitter stack
Bella image
SU markers
flocking
Cricut expression
Cricut Winter Woodland cartridge
Bling
pop dots

Saturday, December 19, 2009

Winter Woodland Wall Art

Okay, today I have some vinyl to show you that I have put in our own home. I used my Expression and the fit to page feature on the 12 by 24 mat to get this wall art. The bird was cut out at 6" and is the perfect size for the fit to page branch. It was funny how the family noticed it, it is not so bold that it jumps out at you it blends in with the color of the living room walls.


Product list...
Cricut Expression
Winter Woodland Cartridge
Cricut Light brown vinyl
Transfer Tape

Friday, December 18, 2009

Off Road Mayhem Part 3

Here is the final installment of Off Road Mayhem, I had a fun time working on these gifts. This one uses the Negative part off of day 1, now all three boys have a Off Road Mayhem version. I think the T is my fave, that was really fun to do;) To see more posts scroll down there are also tutorials.


Product list...
Cricut Expression
Cricut Cars Cartridge
Cricut Vinyl in green and gray
transfer tape

Thursday, December 17, 2009

Off Road Mayhem, part 2

Today I am showing you gift number two made with the extra pieces from yesterday's post. I wanted to make it look like street gear so I used silver metallic paint and created over spray to cover the image and parts of the T. Do this outside in a well ventilated place so you don't over spray anything else;)


Here is a quick tutorial on how I did this T...
1) Launder T and dry
2) Cut the vinyl so it cuts through the vinyl and the backing
3) Weed your vinyl onto the transfer tape and set aside
4) Piece your backing paper onto a sheet of transfer tape
5) Spray with a light adhesive I used quilt backing spray
6) Place on your laundered T
7) Place cardboard inside your t to prevent spray from soaking to back side
8) Spray over design with spray paint
9) Let Dry
10) Peel off the backing from T and throw away
11) Launder T once again after it dries for a day

Note** you can also do this step with the negative in vinyl but I used this for a different project I will show you tomorrow**
Product list...
White T
Metallic Silver Spray Paint
Cricut Expression
Cricut Cars Cartridge
Cricut Vinyl Backing
Light Temp adhesive (I used quilt basting spray)

Wednesday, December 16, 2009

Off Road Mayhem! A layering Tutorial

I have made this Vinyl wall art for my Nephew as a Christmas gift. I used my Expression and the 12 by 24 mat, Cars Cartridge and two colors of Cricut vinyl grey and green. I used the Expressions fit to page key (I can't remember the cut size but this is a huge piece he is going to love it). To make this I had to layer the two colors meaning I had to make two different cuts, guess what I used the other cut to make an additional piece and I used the backing from the vinyl to create another, making that three projects from two cuts.


Video on youtube by Happy Happy Joy Joy...


How to layer vinyl tutorial...
1) Cut your background shape on the highest settings so you cut through the vinyl and the backing.
2) Leave the backing on this cut piece
3) Cut your next layer with all the settings at 3 so you don't cut the backing layer.
4) Make your cut
5) Apply your transfer tape
6) Weed your image (Transfer it to your tape)
7) Layer your image over your background cut.
8) Clean the wall where you wish to place your vinyl leaving no residue
9) Peel the backing from the background shape
10) Adhere to your surface

Monday, December 14, 2009

Cricut Vinyl Tutorial

Today I want to share with you the best vinyl video tutorial I have found on youtube
Video made by expressions vinyl...


Points in the video...
1) Cut only the vinyl not the backing layer
2) Set all the depths to 3
3) Use only the amount of vinyl you need for your project
4) Weeding is taking the vinyl off that you don't use (please save this for another use a great way to use the negative is as a stencil for t shirt painting or etching)
5) Cut down and apply your transfer tape over the weeded vinyl, smooth it and make sure it is adhered well.
6) What she does not show you is that she replaced the backing sheet of the transfer tape onto the sticky side of the vinyl til she was ready to apply it7) Prep your surface making sure it is clean and free of any residue
8) Remove this backing layer for the transfer tape
9) Adhere your vinyl to where you want it placed
10) Take an application tool and adhere to your wall making sure to remove any air bubbles.


I have been very busy crafting vinyl sayings for my Nephews, Niece as Christmas Gifts I will share them with you after the big day. They are stored for now on the transfer tape with the backing placed back on it. On Tuesday I will post a small project I have worked on for our home.

Here you will find the best deals on Cricut vinyl...
Again I am totally blessed by my Sister who found a steal on the Cricut Vinyl while shopping in the Cities at Crafts Direct they had them there for $5.00 Wal-Mart carries a limited selection of colors and the transfer tape. The BEST online source I have found is proudly displayed in my sidebar PRINTONIT.COM now carries over 40 Colors and the best part is you can order a trial pack of 20 6 by 12 pieces for 18.99 so great for all of your smaller vinyl projects. You can also find the transfer tape and etching materials at Printonit plus free shipping on all orders over $50.00.

Friday, December 11, 2009

White Christmas

Yikes after and early start to winter in October we caught a little break in November that all ended this week when we were hit hard by the first real winter storm. This is little J out parading around in the white stuff, the kids were up early out collection ice cream snow. This has quickly become a tradition around here with measurable snow fall the ice cream maker comes out of hiding.

I don't have a project for you today but I am going to brag up our daughter L, her Dad and I taught her to Crochet this past spring all because I wanted to learn how to make those cute flowers that can be found all over crafty creations lately. She caught on also and now is making scarfs in school colors for her sisters and cousins, I think it is really cool! I taught her how to make the pom poms on the end of her sisters scarf (remember those?) in the 70's my Sister and I made them to adorn our ice skates. Yeah, that's right I was really good at it also;)

Here is little J enjoying our first snow...

Thursday, December 10, 2009

One Sick Puppy

I saw this video on youtube and had to give it a try. I left off the frills personally I don't like them on boy cards because I know my Nephews don't enjoy anything to do with girls. LOL, last Christmas the red popcorn looked pink and my nephews reaction was hysterical so now we include a little girl item in his gifts just to get a reaction. I know I am bad but it is so very funny!


Product list...
Cricut
Cricut Doodle Charms
BasicGrey Wisteria DP
Google Eyes
Computer Generated sentiment

Wednesday, December 9, 2009

Painted Ornament Tutorial

Below is the finished product a painted glass ball ornament...


Here is how you can make your own...

Painted Ornament Tutorial Product list
1) Clear Glass Ornament any size
2) Acrylic Craft Paints (I love the glitter or metallic types for this project)
3) Old container to catch excess paint
4) Adhesive Backed Vinyl
5) Cricut
6) Cricut Cartridge of your choice
7) 8" length of Ribbon

Steps
1) Remove hanger from ornament
2) Pour in Acrylic Paint of your choice
3) Swirl the paint around in the ornament making sure to cover the entire inside
4) Place ornament upside down so excess paint can drain out (I used a cool Whip container and egg carton works great also
5) Let dry this could take a few days, make sure it is totally dry
6) Place hanger back on the ornament
7) Tie your length of ribbon to the top
8) Cut your Vinyl
9) Remove the protective backing
10) Smooth vinyl onto the ornament

Below you can see how I drain the ornaments...


Please email any questions to paschal.sara@gmail.com

Going Wild for Cooper

I am so happy to say I am a great Aunt twice over now my Nephew and his Wife had Baby Cooper back in November. They plan on coming down for Christmas so I will get to see him in person then, for now the Beautiful Christmas card that arrived has to suffice. For Christmas gifts this year we are going small and practical this is just part of his gift I altered a Luv's Wipe tub. Luv's brand now prints its label right onto the tub so I took some dp and covered the container, I wanted to use more vinyl but realized this too late. I love how it turned out and was happy to find some animal print DP in my stash. Now they can bring the container to daycare and it is clearly marked to whom it belongs. My biggest pet peeve of having the girls in daycare when they were younger is that fact I always brought and brought and it all went so quickly I am sure our supply helped to cover some other children.


Product list...
Luv's Diaper Wipes
Cricut Vinyl adhesive backed
Cricut Expression
Cricut Doodle charms cartridge
Cricut George Cartridge
Google Eyes 10mm
CM DP


Tuesday, December 8, 2009

Stamping Sisters Prayer challenge

Stamping Sisters In Christ Prayer Challenge find more here at this link. Here is the challenge...
Ceal's challenge is to make a card to let someone know you are praying for them, using images of people (men, women and/or children...angels are okay, too!).

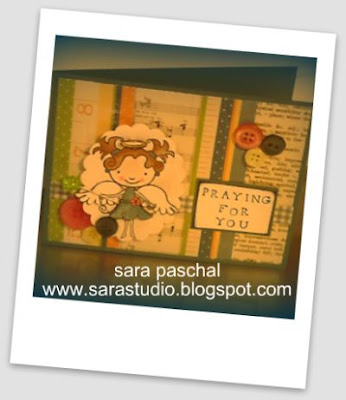
So I used some Lilly Images from my friend Amy and made her an angel. It is so out of the box for me to use cute images such as this, I can't remember how many times I tore the card apart to get it semi wonderful in my mind but here it is...


Product list...
Lilly Image
Alpha Stamps
Colored pencils
MM Chloe's Closet DP and Pin
Scallop Oval punch
Dimensionals
PTI Assorted Buttons
stickles diamond