Thursday, December 29, 2011

ScrapTastic Thank You


CHRISTmas Thank You's

My Scrap box is overflowing Jessica can't keep up;)
I used up some the other day creating thank you cards for my kiddos to send out.
The circles are punched at 1"
Using PTI and SU paper scraps
The sentiment is from PTI  Botanical Silhouettes

God Bless.

Wednesday, December 28, 2011

Happy Hello

I am always short on cards this time of year after gifting and donations etc.  I had to find something that I liked and was quick.  Bonus doing this used up lots of 12 by 12 paper I have.  Get rid of it quick and get a new stock pile for submissions;)
I took and envelop apart carefully, traced and cut it out.  
Then I stamped a greeting in the corner leaving lots of room for writing.
Simple and I like the results, in no time I had a good stack.


Happy Creating, God Bless!

Tuesday, December 27, 2011

Live in the SUNSHINE

Live in the Sunshine
Swim in the Sea
Drink the wild Air
Ralph Waldo Emerson
This should be my Mantra;)

Here is a card I made using the quote.

Inside of the card...

All pieces were cut at 6"
inside done with computer/printer and punches.

Happy Stamping, God Bless.

Monday, December 26, 2011

Pretty Angry Skeletons


Jessica in her new Angry Bird shirt now she matches Mom.  Yep, we are Angry Bird junkies!
She wanted an iPad for CHRSITmas no, she did not get one because that would be insane.
The ground is so dry, no measurable snow to date.  

I received the most Beautiful book for CHRISTmas thought I would share that as well...
You can read a preview and see some pics on this link

I hope you had a Beautiful CHRISTmas with your family and friends.  God Bless.

Sunday, December 18, 2011

Subway Art

Yesterday I shared with you the free links for CHRISTmas subway art you can find the links here
I was waiting for night because there are so many shadows in this room during the day for picture snapping however, I am not sure that even helped to wait.  So sorry for a BLAH pic, looks so grand IRL.

I printed off the subway art in 5 by 7 so they would fit in the frames I had.  My DH calls me the woodpecker because I am always putting holes in the walls.  Not today baby, I am using what I have;)
A few pine boughs and cones from outside and suddenly the wall is festive for CHRISTmas.


I was in need of some quick ornaments, the CHRISTmas program for church snuck up on me.  I am so disappointed that the Church  caved and switched the program from CHRISTmad eve because people are busy.  Too busy to celebrate CHRIST this season in the church, so disturbing for me!!!! 
Thanks for listening to my little rant moving on now to show you the ornament. 
 I printed off the subway art 9 to a page (wallet size setting for my printer).  I just had to trim them up a bit to fit inside.  Inside what?  A Name Badge holder!  A touch of PTI Pure Poppy ribbon and I was set.  I also made it reversible.  

Okay, for this one I found a nativity silhouette online and printed it off so it would fit a...Button.  I have had them for ever in my stash I thought it would work wonderfully and it did;)

Product list...
Name badges
Buttons
Ribbon
computer
printer
digital files

So there you have it three
 totally fast and easy CHRISTmas ideas.  
There are so many free files for this type of printable art not to mention the "keep calm and" printables
You can find these printables and more in my what?

Happy Stamp Day.  God Bless!

Saturday, December 17, 2011

Thank You

I want to take time right now while my Home is quiet to kindly say THANK YOU to all of my Blog readers and followers.  The past two years have been plain crazy around here and I have not been doing a great job of posting.

Donna has healed so wonderfully and has matured to a wonderful Woman.  I am so very proud of our Daughter.

My wonderful husband was hospitalized  very close to death this past spring.  He is learning a bit faster now that he has to overcome his extremely bad eating habits and he can no longer stick to his southern ways.  He was accepted to the VA for health insurance.  Such a burden lifted when that day arrived.

I on the other hand was caught off gauard when my knee dislocated.  I had no idea the damage that had been done and the long road of recovery.  I will have to travel 6 months on this path.  So I am sure my blogging start to January is not going to be a record breaker however, I am starting to wind downhill now;)

These happenings, as big of struggle they were to overcome the GRACE and learning that come from them are truly AMAZING.

So THANK YOU.  I appreciate each and everyone of you.  May God Bless you and your family in the New Year.  May God bring peace, calm and health to my Family in the coming year.

I am leaving some links to BW subway art I have printed off to beautify our home for CHRISTmas.  I have to wait to take a pic there is so many shadows in the photo it is hard to see it as glorious as it is IRL.


Thank you to the wonderful bloggers above who have graciously shared their files free of charge!!!!

All and more can be found in my CHRISTmas Idea Board on 

Happy Stamp Day.  God Bless.


Friday, December 16, 2011

Fake Feebreeze


My SIL loves the smell of Gain and wishes her entire house cold smell like it.  
Well guess what kiddo here you go...
Fake Febreeze
Reclaim your income and the landfills!!!!

1/8 C of your favorite scented fabric softener
1 TSP Baking soda
Reclaimed Febreeze Bottle
Warm tap water to fill up the rest of the room in the bottle.

I used some chalkboard paint on my old Hawaiian scented Febreeze bottle and  some chalk.  

I also placed my Baking soda in a glass jar, reclaiming both the glass and the pour spout lid from an old salt container.  So much easier that that dang box and it will stay dry and not soak up odors.

***I have found this very slippery on vinyl flooring so be careful where you are spraying***

Both of these ideas were found on Pinterest

Happy Stamp Day.  God Bless.

Thursday, December 15, 2011

Brown Paper Packages

Another Pinteresting way of Wrapping up my Handmade Gifts this year.
Simply recycled brown grocery sacks and a black white photo of the precious one the gift is for.
I thought this would be wonderful for the little kids who can't yet read and for the older ones they now have their Aunts favorite pic of them;)

So here is the wrapped gift for my Nephew (Marshmallow Gun)

This is where the idea came from

Here are more from

Want more...


Happy Stamp Day.  God Bless!

Wednesday, December 14, 2011

Candy Cane Reindeer

I found this project on Pinteretst you can take the link below to my 


My Husband will be taking these to school for his Kiddos.  My girls love them I have to tuck them away before a few go MIA.  They have also asked for a few for friends, by the time I am done there will be around 50 candy cane reindeer, YUMMY!
There was one broken one that said eat me I will claim that loss;)

Tutorial:
Cut your brown paper
4 1/4" by 2 3/4"
Attach canes to each other with red liner tape
Run one line of liner tape on back, long side
Wrap card stock around canes and press the tape firmly
Glue two google eyes and one pom
Let dry
And let the reindeer fun begin

Happy Stamp Day.  God Bless!


Tuesday, December 13, 2011

Marshmallow Guns for the Nephews

Handmade gifts for my Nephews this CHRISTmas, Marshmallow Shooters from 1/2" PVC.
WARNING** these are super fun one won't be enough;)


**Make sure you use a spray paint made just for plastic or purchase a plastic primer.**

Here is the gift set complete with ammo and safety glasses.
Every Year they also get an ornament from me you can see the beaded wire star on the bottom right.
It is so cute when you walk into their bedrooms they each have a small CHRISTmas tree decorated and lit, so darn cute!  Night light and the beauty of CHRISTmas all in one.

Here is the link for directions Mom's Crafty Space

These are really fast and easy not to mention they won't break your bank account!

If you are looking for my seasonal 25 days of CHRISTmas please go to facebook
 I have posted 13 days so far there.

Happy Stamp Day.  God Bless!

Friday, December 9, 2011

Arise and Shine

Brings me back to Sunday School....
Arise and shine and give God your Glory Glory...be happy you can't hear me singing;)

Also goes along with CHRISTmas day 9
Isaiah 60:1
"Arise, Shine for your light has come, and the glory of the Lord rise upon you"
Thank you for following along this year on Facebook, 
I am getting better daily hope to be back blogging daily soon.
Soon and very soon... (there I go singing again;)

We have been working on some lanterns for the trees outside here is a sample

Jesse Placing the lights on the fence line.  I Picked white, plan on leaving these bad boys up year round can't wait to see them in the summer.  YES, we live in SD and Yes, there has been no measurable snow this year.  We are getting VERY dry!  
Have not been able to use 4WD in the new SUV yet either.
  Doesn't she look sweet?   Her name is Pearl;)

And for your singing pleasure.  You are welcome, LOL!


Hope this post has you singing along and shining your light.

A quick easy tutorial:
Fill cleaned Steel can with water.
Place in freezer or outside if you live in the right climate.
Take a nail, hammer and template and start punching your outline.
(I used a star cookie cutter for our template and taped it to the can)
You can find more elaborate designs on the web however, I was shooting for easy.
Spray paint and let dry.
Attach wire to one side of can, bead around to the opposite side and attach creating your handle.
I am using battery operated tea lights you can also use regular tea lights just have to keep an eye on them.
Hang and enjoy.

Happy Stamp Day.  God Bless!


Thursday, December 1, 2011

Penguins and Popsicles

My Great Nephew's CHRISTmas gift
He is 2 this year so Auntie Sara created...
Penguins and Popsicles
A personalized gift containing...
Book
Memory Game
Vinyl decorations
Popsicles Freezer Accessory


Here is a view of the Popsicle memory game fronts...


Here is a look at the flip side
1-5
Cooper
and Penguin friends
I made it this way so they have lots of options when playing the game with him.
All the pieces fit nicely into a salvaged Mayo container.
I used wooden spoons to hopefully make it easier to turn the pieces remember he is 2.


And the book I printed off and created for him.  It is so darn cute, I continue to amaze myself at times.


This gift took me literally days to create.  A little here and there and lots of love and prayers.  Lots of prayers for patience.   I need to count how many google eyes I used they were about to drive me CRAZY.
That is another reason I love creating my own gifts instead of going out into the crazy world of retail and pick out a meaningless toy that in two days will probably be lost or broken and not remembered.
It is giving from the heart that makes this season beautifully special for me.


I made it my own and personalized it for Cooper.


Hope you are inspired to go get creative on some of your gifts this year.

25 days of CHRISTmas day one you can find on my FACEBOOK post for today
Happy Stamp Day.  God Bless.


Friday, November 25, 2011

Rachel's Christmas Gift 2011

I love these altered Oatmeal canisters used for hair goodies. 
 I made one for Jessica now everyone is begging for one.  I can't eat that much Oatmeal peeps;)

Below is a CHRISTmas gift for my niece who loves pink and purple.
I also altered a few barrettes and some headbands.


Now for the inside goodies I recycled a cardboard tube to hold the hair bands and a magnetic paper clip holder for those DARN bobby pins that are so in love with my  vacuum!!!!
I cut a felt circle for the bottom of the tube so the inside can be used for storage of more bands.


So one gift down and many more to go.
She is going to adore this, can't wait to gift it.

These ideas can be found on my pinterest boards, I have been a busy on pinterest as of late;)  I need to stop getting distracted and get back on the crafty MAKING track.

If you live in my area and have Oatmeal Canisters please if you would save them for me.  Thank you;)

Have a happy stamp day!  God Bless!


Saturday, November 19, 2011

Pumpkin Place Cards


My Aunt and Uncle called me this past week asking if I would have time to make some place cards for Thanksgiving.  Heck Yes, sounds like fun to me.
They turned out really cute here is how they are done.

Punch 8 circles, fold them in half and run your score tool over the fold.
I used quick dry adhesive to stack the eight half circles.
Cut off a small amount of the bottom so they will stand correctly.
Glue halfway up a toothpick and insert into the center of the pumpkin.
LET THIS PART DRY, does not take long but makes life easier;)

On the computer I generated all of the names and used the center point function on the cricut to cut the names out on the leaf.
Emboss the leaves that do not have the name printed on them.
Tie bow right above where your toothpick was inserted.
Glue on the leaves, placing the name leaf on the right hand side.
(I also glued leaves to the back to make the project looked finished from all sides.)
Tie button and adhere with dimensional foam dot.
Trim down toothpick so it is just above the leaves.

Products used...
SU DP, card stock, impression plate and ink
Quick dry adhesive
Circle punch
Toothpick
Computer and printer
Cricut and Plantin Schoolbook cartridge
PTI twine

Here is the link for you to my Pinterest pin so you can see where my idea came from.

Happy Stamp Day.  God Bless!

Wednesday, November 16, 2011

My Live is Pinteresting Part 3

You may be wondering why I am not posting cards or scrapbook pages.  Well, for me right now it is just to painful to sit in my design room. However, I was able to get to a 104 degree bend this past Monday.  Standing  in the kitchen is strengthening my knee quickly so hopefully I will be able to create paper crafts again soon.  
These have been some really good tips, hope you are enjoy them.

Today I worked out a perfect dish washing powder that works well for our old school hand washing of dishes.  With 5 of us they sure can stack up quickly;)
What you will need...
EQUAL Parts
1.  Washing Soda
2.  Kosher Salt
3.  Ivory Bath Bar

4. Fine Grater
5.  Jar to mix and hold the powder

Yes, your soap does have to be this fine otherwise it will not dissolve in your hot wash sink.
**As for the post on laundry soap you will also need your bar soap looking like this.**

Now this works perfect for us, I tried many other combinations with not so good results.  Basically, everything else left a yucky film on the plastic dishes.  This mix does not leave that film and works well with our rural water.  It takes one heaping Tablespoon per sink load.  Another money saver and a greener way of doing things around the Paschal household. 

If you have some DIY household tips you love to use please share in the comments.
Happy Stamp Day.  God Bless!

Tuesday, November 15, 2011

My Life is Pinteresting Part 2

Oh, how I love thee Frigidaire Affinity!!!!  
The Gear Box went out on our old set and Jesse said he was not going to fix it this time.  So Veterans Day we went shopping (NOT RECOMMENDED) every store was busy.   Anyhow, we did find something I liked...
High Efficiency, large capacity, with steam washer and dryer set.
You can see my handmade Downy Dryer sheets soaking and waiting atop the dryer...LOVE THEM!


One problem with the new HE washers, you can not use regular laundry detergent.  All the bubbles created will clog up the small capacity pump and do damage to your washer over time.  So...what to do????  Not going to use the HE detergent way to expensive to be using on a family of five, it would totally break our budget for cleaning supplies alone.  So with some research and the help of PINTEREST I found this...


We found everything side by side on the shelf at Walmart. 
I had the numbers crunched and the cost per load is 2 cents.  That is right 2 cents, one penny for the pre-wash cycle and one penny for the wash.

Two hard parts for me in the creating of the soap
The bar soap was hard for me to grate, you need to use the super smallest size you have making it look like shredded cheese.  Any larger pieces are hard to melt during the process.  
I am not sure if it was hard just because I was not feeling a 100% or if the soap is just that compact.
It also takes along time to cook down to a honey consistency, stir and watch carefully.

We all love it, works wonders on the laundry and does not bust the budget.
Give one or both of these a try and let me know what you think.
Now I just need Jesse to get that outdoor laundry line up for me!

So that is my two cents;)
Happy Stamp Day,  God Bless!

Saturday, November 12, 2011

My Life is Very Pinteresting

You can always take the link to my pinterest board it is found under my header.
Since it is really difficult to sit in my design room I have not been able to create for blog posts:( however to build up some strength in my knee I have been in the kitchen more than usual. Hence the post for today done with help from little j.

This can be found in my tips and tricks board about fabric sheets.
1. Cut up a kitchen towel on the fold lines giving us six sheets.
2. Poured 1/8 cup Downy over the towels.
3. Let them soak in sealed container.
4. Ring them out and let them dry.
5. Throw dried cloth in with load.
6. It is stated that each sheet will last 40 loads.

Helping to save some on the monthly budget and help green up the planet with less plastic and dryer sheets.

God bless!

Tuesday, October 25, 2011

Spooky Sweets

Simple and easy treat for Jessica to take to school. 
 In fact it was so cute the Teacher had to ask DH if it was meant to be eaten.  LOL;)
Front view of the tag and ribbon...

Back view, now this little buddy wants out of the jar quick

The tag was put together quick from old stash the products I am aware of makers are...
PTI Spooky Sweets stamp set
Tim Holtz flattened bottle caps
Basic Grey Bat and flourish from card kit eerie
Ribbon from Hobby Lobby
Recycled Jar with spray painted lid
Various Halloween candies

Happy Stamp Day.  God Bless.

Wednesday, October 12, 2011

Today marks one week without our Cody.  He is so very missed around here.  Love you little man!


The link below is to the first post introducing  Cody.

I am feeling better each day, hope to be creating again soon!

Tuesday, October 4, 2011

Just an Update

Lot's of you have been asking where I have been.  Well I went in for Knee reconstruction on September 1.
I came out of it with almost having a total knee replacement.  They continued with just a reconstruction for now could last up to 10 years then I will need a total new knee.

So needless to say I have been groggy, crabby and just getting plain tired of doing nothing but tip toe around the house.

Note to self need a footstool to get in the Durango, should have had a camera going for that one!

Each day gets better God is showing me many wonderful things and more good times to come soon;)

I did post the laproscopic photos over on FB if you wish to see.  I

Thursday, September 1, 2011

Reconstruction Time


No, not another blog look!  I know that is what you were thinking;)
 Not yet anyhow,  I am working on my own version from scratch
and is taking more time than anticipated.
 I will be have more time on my hands and this is why...
TOTAL KNEE RECONSTRUCTION 
Many of you following me know that since April of this year I have been struggling to rehab my knee.  
My stubborn attitude had me thinking I could rehab it and avoid surgery.  
My luck would have it this thus backfired  
causing more problems for the surgeon to fix.
Go figure!

Our little Jessica says, "they can't just give you a robot knee or something".
HaHaHa!  Comedians are abundant these days!
In older patients this type of damage would require a replacement. 
 Thank goodness I don't fit into that category yet!

So not looking forward to the pain and discomfort. 
 In fact I am terrified! 
 I am struggling with the WONDERFULLY made portions of Psalms 139:14 
The FEARFULLY part is scorched into my memory however!
(Oh, crap!  I better watch it
who knows what he is ready to throw my way next!) 

Here is what has to be done...
Knee Scope
Chondroplasty

So I am going to be in a world of hurt, not knowing when it will end is were I am hung up.
I can handle anything for a predetermined time.
The closest the Dr will say is six months to arrive at a pain level of 1.
There better be some wonderful painkillers involved that WORK!!!!
That I won't develop an allergy to,
 or make me feel like BLAH 24/7!
A girl has to be able to type and surf after all;)
Possibly keep her eyes open long enough to catch up on some TV!

I'll be back!
Heck, I may even take on the steps like Rocky...

OKAY, NOT!
 However, a visit the Philadelphia Museum of Art is on the list.
And a BOWLING PARTY!

When health is lost, something is lost; 
When wealth is lost, nothing is lost; 
when character is lost, all is lost.
Billy Graham
I  would appreciate you saying a few prayers for me.
I will be back when I can.
Follow me on FB and Twitter for updates.
 Happy Stampin' and God Bless!


Wednesday, August 31, 2011

What is for Dinner? Part 2

Okay, yesterday I shared the breakfast and lunch menu for September.  Today I actually have the Dinner menu for you.  LOL!  Keeping it easy the kiddos and DH will be in charge for the month.
Countdown 1 day until my knee reconstruction.
Then I wake up this AM to the sound of a dying fridge, UGH.
 Has to be a side by side I won't have anything else!
Place that on the top of the shopping list and 
snip out a few quick picks for DH just so he understands what I want;)

Here we go...
Pork Chop Casserole
6 pork chops, browned in butter
Wash and cut up 10 new potatoes
1 med onion
1 can cream of mushroom soup
1 can milk
salt and pepper to taste
combine in this order into a greased baking dish...
potatoes, onion, browned pork chops
cover with cream soup and milk
salt and pepper
bake at 350 for 1 hour


With steak 

Brown Steak and Gravy
(My Mamma's recipe we had it on Christmas Eve)
3 good size round steaks cut in half
Brown in butter and cook in pressure cooker until falls apart with fork
Make gravy from the pan drippings and liquid in the pressure cooker
Corn starch mixed with COLD water so you don't get lumpy gravy
Salt and pepper to taste
serve with mashed potatoes.

Grilled Chicken Breasts
with veggies

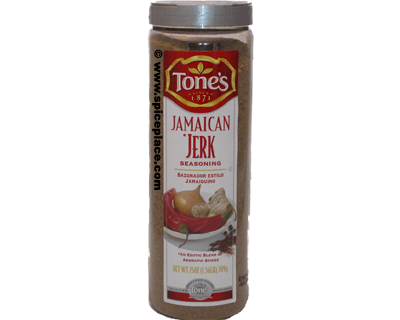
Caribbean Jerk Shrimp with rice

Chili

Chef Salad

Spaghetti Shells Bake

with or without chicken
You can find gnocchi by the noodles (good in a pinch) but nowhere near the taste of handmade ones. 

I use cream of Mushroom soup, green beans and corn no cheese in mine.


Reuben Roll ups
1 pkg crescent dough
1T thousand Island Dressing
1C sauerkraut
8 thin slices of Corned Beef
2 Slices of Swiss cheese
Combine sauerkraut and salad dressing
Unroll the crescent dough in to eight triangles
fill with one slice of beef, 2T of sauerkraut mix and two cheese strips
roll up and bake 10 to 15 minutes at 375

Oven Swiss Steak
1 lb. beef
2T flour
1/2 t salt
2T Butter
1/4 t Worcestershire sauce
8 oz tomatoes
1/4 C celery
1/4 C chopped carrots
1 small onion
Shredded Sharp Cheese

Pound salt and flour into the meat, Brown meat in pan with butter. 
Place in bottom of greased casserole
Blend remaining flour (1/2/T) in pan drippings add all but the cheese to the skillet cook and stir constantly until mixture comes to a boil.
Pour over meat cover and bake for 1 1/2 to 2 hours at 350.

Homemade Pizza

Marge's Chicken Hot Dish
1 can chow mein noodles
1 can chow mein vegetables
2 C chicken
1 can each cream of mushroom, cream of chicken
1 soup can milk
Potato chips
Mix, pour into buttered dish, cover with chips and bake 350 for one hour.

Stouffer's Lasagna

Many of these dishes lend well to leftovers.  Some nights we designate as leftover night to use up the leftovers.


Have one you really enjoy, let me know;)

Free Download by Corrina Gardner

Happy Cookin'.  God Bless!