Showing posts with label Tutorial. Show all posts

Thursday, November 7, 2013

My Memories Digital Scrapbooking Software V4 YouTube Channel

"MyMemories Suite Version 4 digital scrapbooking software is a fun and creative way to create scrapbooks, photobooks and more, whether you have a Mac or PC. The software's design tools will help you to build entire albums and other printable projects effortlessly using one of the many installed templates or designing your very own pages from scratch."
 
Purchase price
$39.97
When you use my code at checkout STMMM97 you can save $10.00
 bringing the final cost to $29.97.
 photo My-memories-blinkie_zpsb86c9972.gif
 
My Memories Digital Scrapbooking software is ranked #1 in the industry.
You can learn more about My Memories Digital Scrapbooking software HERE.
You can read the review HERE
 
Today I have a link to share with you.
It is the My Memories YouTube channel.
Here you will find tutorial videos on how to create with My Memories Software.
 
And more links for you:


Youtube Videos

So what are you waiting for?  Go on an adventure and create your memories now.
 
Thanks for stopping by today:)

Thursday, August 15, 2013

My Memories Import Outside files and Version 4 Digital Software GIVEAWAY

I am back today with my version of the My Memories Designer Bag freebie this week.
Below I will show you how you can import your own digital files into the software.
It is super simple and makes the possibilities for your creations endless.

There is also a GIVEAWAY.  You don't want to miss this one.

My designer bag...
Steps to import files into your My Memories project.


1.  Open your downloaded template file.  This one is called Designer Bag.

2.  Click background papers/custom/ (open the folder that contains the paper you wish to use).
For this project I used my Epic Ride kit and my favorite paper Gingham Distressed.

It is that easy and you can use any image file on your computer from jpg to png's.

Click on photos to enlarge.

Below you can see the imported digital paper under the template.

Here is a video from My Memories...

 
  1.  Leave a comment on this blog post before midnight CST September 1st 2013.
2.  Include in your comment Your favorite
My Memories Store
 
I will choose one comment to receive
Version 4
digital software download.


Want to
get started with
today? 
For less than $30 and get $10 worth of free products,
this is a great steal!
CLICK HERE to read about the software.
Remember to use my coupon 
STMMM97 
to receive $10.00 off your software purchase.


Youtube Videos

So what are you waiting for?  Go create your Memory today!
 
Thanks for stopping by today:)

Friday, August 9, 2013

I'm Booked T and Silhouette Cut File Tut

 I have had my fabric paint starter kit from Silhouette now for half a year.
Finally I have decided to make use of it;)
Had to make myself a little treat so I could show off one of my favorite past times.

I have the cut file for sale over in my shoplocket store.
You can also fill it in and create a print/cut file to your liking.
Here are some bookmarks I did just that with...


 Here is the cut file preview...
Purchase your studio cut file today with the link below.

Here is a tutorial on how to use the studio cut file as a template for t shirt fabric painting.

1.  Wash and dry the fabric you are going to use.
2. Tear off a 12' by 12" piece of freezer wrap paper.
3.  Attach the freezer wrap paper to your Silhouette Studio Carrier Mat.
4.  Open your Silhouette Studio Design software.
5.  Select open file.
6.  Find and open the I'm Booked cut file.
7.  Size to your liking for your project.
(If you wish you can also color the file and change the cut settings so you can create just a print file such as I did for the bookmarks shown above.)
8.  Send file to Silhouette Cameo Cutter.
9.  Carefully remove the freezer paper from the cutting mat.
10.  Iron your fabric on the hottest setting allowed.
11.  Center your cut stencil on your fabric SHINNY SIDE down.
12.  Iron on the Freezer Paper Stencil.
13.  Place cardboard inside the fabric to avoid transfer of paint to the other side.
14.  Using paint created for fabric or acrylic paint mixed with a fabric medium
(both are available at your local craft store)
carefully dab on the color using a foam brush or a sea sponge.
15.  Let the paint dry.
16.  Remove the Freezer paper stencil.
17.  Show off your creation proudly.


Thanks for stopping by;)

Monday, June 10, 2013

A Happy Hello

A happy Hello Indeed;)  It has been over a month and I have not touched anything
creative in my home.  Between a late spring ice storm, Graduation and little j getting
ill, life has kept me very busy.
However, yesterday was my birthday and I spent it doing things I totally enjoy
reading and card making.
I picked up some cute images from Sherri Baldy turned on my Mac and enjoyed my special day.
Here is one of my creations....
Don't you just love Sherri Baldy Stamps?
They are so dang CUTE!
Below is my digitally colored image created in PSE10. 
The thing I love best about digital stamps is paring them up with all the
 digi scrapbook kits I own.
This creation used "Just About Me" from Sara Schmutz.
I found the download over at Design House Digital...


 The beaded flower was made a very long time ago. 
 They are fun to do however, they require 
a lot of patience.

card stock, buttons and sentiment are from PTI.
 

Thank you for stopping by today;)
Recollections paper flowers.

Thursday, March 28, 2013

Digital Stamps and the Silhouette Cameo

I have been asked to help out the
QKR Stampede and Eureka Stamps
Technique and Tutorial Team.
So I posted yesterday over on the
QKR Stampede blog the following tutorial.

I have also been asked if my Cricut is headed out to pasture.
It certainly is tucked back a tad farther and has not seen the
light of day for a while because the Silhouette Cameo is just that AWESOME!
I love to use digi stamps and digitally color them using PSE10 so it is a perfect
fit for  my design style.
If you have not check into this yet now would be a great time;)

Hello and welcome to this weeks tutorial post.
I am Sara and today I will show you how you can use
your wonderful digital stamps with the Silhouette Cameo design software and cutter. 
(Click on any  photo below to see actual size.)

For the tut today I am using:

** I will be working with a pre-colored 
digi stamp however, if you like to hand color
your digi stamps the process is exactly the same just open
the downloaded digi file for the first step.  
Sadly, I gave Copics a go and it totally was not my thing so I stick
to what I know and love my Adobe software AI and PSE;) 

Here is my finished card, a CAS creation that looks just fab...
Click on photos below for full size pic.


 Below you see the printed digi stamps on the carrier mat.  **I did go back and included the basic digi stamp uncolored.  

 Below you see the cut digi stamp images still on the carrier sheet.  The excess paper has been removed...

The nicely cut digi stamp and some dimensional foam tape meet a CAS thank you card...

Thanks for stopping by today;)

Saturday, February 16, 2013

Digital Stamps Fabric Transfer Tutorial

I posted a tutorial this week over on 
Eureka Stamps Blog
showing how to use your digital stamps with fabric transfer.
You can go check it out


Thursday, January 24, 2013

Embossing with Digital Stamps Tutorial

Thanks for stopping by today, I have a wonderful
tutorial treat just for you.
Embossing with Digital Stamps

Today I am using the Skater Girl from
Sassy Studio Designs.
She was a freebie over on Paper Craft Planet
last Friday.
Please see yesterdays post for the 
card and more details on the image.

Here she is, the image I am going to feature in today's tutorial. 
 I LOVE HER, so fun to work with.
The girls were fighting over my finished card from yesterday
as to whom was going to keep it.;)


I am also going to be using this digitally colored
version of the stamp.

Here we go, are you ready to have your mind blown?

Step 1:  Digital stamp files come as jpg or png, you will need to open your digi stamp in photoshop make a duplicate file and save this file as a PSD.   
This will only work using a psd file!
*While you have it open you can color and/or add in your digital papers as I have done above then save as a PSD.  I prefer the finished look with the colored image, there is more texture.  I love how it even picked up the pattern of her top and the skateboard.  It is totally SICK!

Step 2:  Open a new project in photoshop 8 1/2" by 11" size,  load it with a solid fill color.

Step 3:  Move up to FILTER, scroll down to TEXTURE  then TEXTURIZER
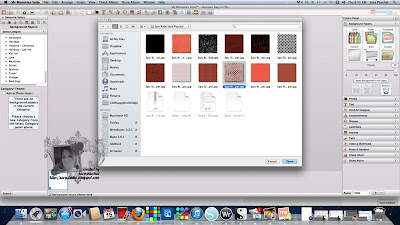
Step 4:  Texturizer will open up in this screen shown below,
you will need to load your PSD file here.
Click the circled arrow and you will get a load texture prompt, click on the prompt.
Procede to your digi Stamp PSD file and open it.
You will see your image appear as shown below.


The texturizer screen...

Step 5:   You can make many adjustments with the scaling, relief and light selections.  You can also invert the image in this section.

Step 6:  After the image looks the way you want it click ok and you will be brought back to the main edit screen.

Step 7:  Save your new file, I will usually save it as a PNG however,  jpg also works.

Embossed Digital stamp as is...

Colored digi, see what I mean about the extra detail?

 So have I blown your mind yet?
If not and you can handle more keep going as I show you
how to make a seamless embossed pattern that you can use
to make 12"by 12" digital paper.

 Open a new file 1" by 1", load the background color you wish.  Obviously I used red here.
Open another new file and fill it with the pattern you desire, save this file as a PSD.
For example in the top photo I have filled my new document with this really awesomesaucy heart pattern from succo design.
Yeah, I had a good laugh at their name as well;)
Make sure you save this heart design file as a PSD.

Follow steps 1-6 above

Now when you are back to the edit screen do this...
Edit
Define Pattern
Save your embossed pattern
Click on the paint bucket making sure you check the pattern box and use the drop down arrow to pick the pattern you just created.
Open a new file this time use scrapbooking 12" by 12"
Click on your new file, the paint bucket will now seamlessly fill your 12 by 12 page.

Is it not beautiful or what?
Thanks for stopping by today;)
You can email me with any questions you may have: 
paschal.sara@gmail.com

Thursday, January 10, 2013

Blog Load Optimized Part 3

Today I have the last of my three part series on
Optimized Blog load times we will be talking about
3rd party links and code.

If you want to become a serious blogger or learn a bit more about code I recommend this book.  
Yes, I use it and reference it often while building new scripts.  
click here to be taken to amazon site

It is imperative if you wish to have a well organized blog that will give you and others
more enjoyment to be knowledge about 3rd party codes.
Mostly become familiarized with finding the image source in the code so you can change it.

Below is a script from the

document.write(unescape("%3Cstyle%20type%3D%22text/css%22%3E%0Abody%20%7B%20background-image%20%3A%20url%28%22http://thecutestblogontheblock.com/wp-content/uploads/2011/10/graffitimyheartcopy.jpg%20%22%29%3B%20background-position%3A%20center%3B%20background-repeat%3A%20no-repeat%3B%20%20background-attachment%20%3A%20fixed%3B%20%7D%0A%3C/style%3E%0A%3Cscript%20type%3D%22text/javascript%22%3E%0Avar%20div%20%3D%20document.createElement%28%27div%27%29%3B%0Adiv.setAttribute%28%27style%27%2C%22position%3A%20absolute%3B%20left%3A%200px%3B%20top%3A%2030px%3B%20z-index%3A%2050%3B%20width%3A%20150px%3B%20height%3A%2045px%3B%22%29%3B%0Adiv.innerHTML%20%3D%20%27%3Ca%20target%3D%22_blank%22%20href%3D%22%20http%3A//www.thecutestblogontheblock.com%22%3E%3Cimg%20border%3D%220%22%20src%3D%22http%3A//www.thecutestblogontheblock.com/images/tag.png%22%3E%3C/a%3E%27%3B%0Adocument.getElementsByTagName%28%27body%27%29.item%280%29.appendChild%28div%29%3B%0A%3C/script%3E"));
All the highlighted links are called third party links below is where the link will go:
1.  It's job is to take the user to the background image so the web viewer can see it in their browser.
2.  Web address back to The Cutest Blog on the Block
3.   Image file for their branding of the Cutest Blog on the Block that will float at the top of your web page.
 NEVER CHANGE 2 or 3 to claim the look for your own. 
 Doing otherwise is just WRONG!


Now take these highlighted links and see just what each one is doing:


If you wish to optimize the background and I  highly recommend that you do, follow the steps below.

You found that the first link takes you to the background image for Graffiti My Heart.
When you get there command/click (on Mac)
You will get a menu click save image to downloads.
You can optimize and save this file then upload it through blogger background in your template customization option.

By doing this you have created an optimized image in a location where it will be searched for only by the users and search engines accessing your blog thus making the retrieval time much faster.
Making sense?
(It is still a third party code however it is Optimized now.

Now take this link to 
my site where I test my scripts before I use them

Here is how the hacked script runs on my work in progress site.  
Notice what is missing?  The image code.
Notice what I left intact?  Designer links and image.

document.write(unescape("%3Cstyle%20type%3D%22text/css%22%3E%0Abody%20%7B%20attachment%20%3A%20fixed%3B%20%7D%0A%3C/style%3E%0A%3Cscript%20type%3D%22text/javascript%22%3E%0Avar%20div%20%3D%20document.createElement%28%27div%27%29%3B%0Adiv.setAttribute%28%27style%27%2C%22position%3A%20absolute%3B%20left%3A%200px%3B%20top%3A%2030px%3B%20z-index%3A%2050%3B%20width%3A%20150px%3B%20height%3A%2045px%3B%22%29%3B%0Adiv.innerHTML%20%3D%20%27%3Ca%20target%3D%22_blank%22%20href%3D%22%20http%3A//www.thecutestblogontheblock.com%22%3E%3Cimg%20border%3D%220%22%20src%3D%22http%3A//www.thecutestblogontheblock.com/images/tag.png%22%3E%3C/a%3E%27%3B%0Adocument.getElementsByTagName%28%27body%27%29.item%280%29.appendChild%28div%29%3B%0A%3C/script%3E"));

Other than blog backgrounds 3rd party links are also found as .Gif, Blinkies & Badges 
in the blogger sidebars.
You can go locate the image file and save it just as I did the background and upload through
blogger interface as an image, you can link it up here also.

To sum up the past three days:
1.  Be aware what 3rd party links do for your blog load time.
2.  Keep third party links at the bottom of your blogger layout so they will load last.
3.  Third party links should be kept to a minimum.
4.  Optimize your image files for the web.
5. Posts on your first page should be 10 or less.
6.  If you want to use more third party links have less posts loading on the front  page.
7. YOU HAVE 3 SECONDS to hook and capture a repeat visitor.

That is a good start hopefully you can implement a few suggestions
 so we can all enjoy the blogging world more.

Thanks for stopping by today;)

Wednesday, January 9, 2013

Blog Load Optimized Part 2

Today I want to cover a bit more on Image Size.
It is a big hit out there for fans of pre-made blog backgrounds to 
use  HTML/Java Script Blogger Backgrounds.

are just a few big names that supply such files.
And note that when you arrive at their sites some of the pages are optimized, ironic isn't it;)

Yes, they are beautiful!  After it takes them FOREVER to DOWNLOAD
 the page link you are searching for.
They are not optimized and they are huge image & HTML/Java Script  3rd party files.
Yes, they will also pop up again in part 3, that is how nasty they can be to your load times.

Seriously, this is a huge deal.
They are great to have if you are a small blogger promoting your
 crafty creations and sharing family pics.  I thoroughly enjoy reading my friends blogs and since I am a frequent visitor there my load times are quite small.

However, if you are a business, partake in blog challenges,  & are DT Members having a slow loading blog can take you out of the game really quick. 
*Note it has stopped me from venturing to some blogs that I know will take a LIFETIME to load.    As I stated before it is a huge waste of my time and I choose my time wisely.

So please contact someone you know who can help you create an optimized blogger site or stick to the basic blogger templates!  K!  Thank you, I would greatly appreciate it!

Okay, if you just can't let go of these pre-made cutesy blog backgrounds here are some of my tips.

1.  Place the 3rd party HTML code or JAVA Script at the bottom of your page layout, 
this way it will load last.  If it is placed higher up on your layout it is being sought out first and slows the load of your other image files.
Easy enough, you can do that.

2.  Open your text editor and place the code for the blogger background you downloaded.
Seek out the image source files, place the image file link code in your browser and you will be taken to where this image file is hosted online.
Download the image file to your own computer.
Optimize the image.
Upload your image to your photo hosting site
copy the direct link code
Paste the code back into the code from your provider to your direct link.

If that sounds too involved or scary, go grab the image file from the net.  Save it to your own computer.
Optimize the image and upload into your blogger interface. 
This works also.

Bottom line if you really like the look of the pre-made template it is best to have the Image files on  your own computer because often these sites run out of space and delete some 
of the older templates and files.  
Then your site will not load properly, and that is never awesome!

Okay, I think that covers the PRE-MADE templates.

So onto number 2
The number of posts your show on your home page.
The standard is 
10 or less.
Mine changes with other postings or scrips I may include in my page for a season or special sale.
Right now I have three posts set to load on my front page.

This is a SUPER easy fix.
Blogger
Design
Settings
Posts and comments

The very first option you are given says post how many ---- on the main page.
If you have a small load time set it higher, if you choose to run more scrips or have larger image files lower the amount of posts that load on the main page.
See, super easy quick fix that gets you on the road to an Optimized blog load time.

I shall see you tomorrow with part 3
3rd party HTML and JAVA SCRIPTS.
Thanks for stopping by today;)

Tuesday, January 8, 2013

Blog Load Times Optimized

There are numerous bloggers now on the crafty circuit, as part of my Design Team commitments
I visit a good percentage of them on a daily basis.
Actually I had to stop doing so because so many blogs
are bogged down with nonsense that creates extremely long page load times.
For me I found it not to be worth my time.
I bet when you track your blog hits you will find it to be true about not having repeat visits because of your slow load time.
Also Google has updated the algorithm they use to place the blogs with optimized load times
higher up on the search engine.
I know, that is a HUGE deal!

It is also stated that the standard load time should be 
3 Seconds.
Here is where my blog performs when I used Gomez:
2.18 Seconds
Yes, I am even under the normal standard;)

You can try some of these links to find out your blog load time.
Gomez (this is what I have used)

There are three main things you can do easily:
1.  Image Sizes, 
 the main reason for long load times.
This also effects the load time of your linked blogs if you are using the blogger fave blog list widget!
Please take special note here because this is slowing everyone down and I personally love showing off your images and links in my side bar.  There are options to take where you can show just the blogger logo with the link or just show the link alone.

2.  How many posts you are loading on your front page?
10 or LESS is Optimized. 

3.  Third party links  

Today we shall talk about
Images
Since most of us Crafty bloggers are in the game to show off what we have done you want to make sure you are keeping your image at a good resolution and a smaller size at the same time.

Most galleries now will not accept a file larger than 300K, that is a good start.
However not optimized enough!

I use PSE so I will only be telling you  how I use that platform.
Open up PSE
Open your photo file you are wanting to use
Crop and edit your image
making sure you use your watermark
(Save for WEB)
this is a very critical step.

Here is my optimized image at these saved web settings
141.9K using Gif-perceptual-transparency
I play with mine to see how low I can go and still maintain a quality image for posting
 however, this is what I use the most.
So check out your load time and see how you can optimize your image files.
I will be back with more talking about your Main load page next.
Thanks for stopping by today;)


Saturday, October 27, 2012

Digital Stamps Tutorial

Today, I am going to show you how I use my Digi Stamps with an easy
Photoshop Tut.
The sentiment digi is from
QKR Stampede
10907Ancient

This is the card I showed you yesterday.  
The post for it can be found here.

I have taken the leap into digi and I am not looking back.
I totally enjoy creating with my computer and using digital image files.
Not only do digi stamps take up less room you indeed have more
creative freedom of use.
Size
&
Color
 are my go to examples.

Below is the digi as you see it in the
QKR Stampede Store
it is a JPG image file.
This means the background is not transparent.
With digital stamps more often than not the background
will be white.

1.  Download your digital image
2.  Open digital stamp in Photoshop
3.  Use the file menu to duplicate your file
(this way you are not making any changes to your original digi stamp)
4.  Close your original file
5.  Select your magic eraser tool and 
begin clicking in on the background
 to remove.
(in the photo below I left some white in Ancient so you can see the process)
I do this because I love to add drop shadows and outlines and the finished project
is more awesome with transparency.

6.  Apply your colors and effects
Then I added a complex  Color Target function.
In order to do these functions you MUST remove the entire background from the jpg.

When you don't remove the entire background you end up with something like this:
NOT PRETTY!

Here is the digital stamp colored and saved as a png file 
to maintain the transparency done the proper way:
Print it off in the size you need and you are good to go.
That is an easy way using the content short cuts 
(and there are MANY to choose from).

So my suggestion is to always remove the JPG white background
and when you save your file after you are completed save 
as a PNG.

So are you ready to give this digi sentiment stamp a try?
Meribeth from QKR Stampede has agreed to let me give this digi sentiment ancient to my blog readers.
AWESOMESAUCE!  Thank you, Maribeth;)
Please, leave a comment below with your EMAIL address so we can send you your free image.

You can also download the background I created for my card, just click on image and save the file.