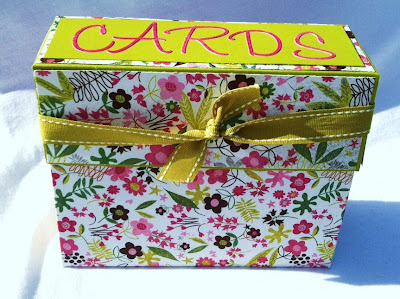
Showing posts with label Card Keepers. Show all posts

Sunday, August 12, 2012

SuPeR StAr

Welcome Crafty friends to the Eureka Stamps
For my project I worked on a little gift kit
for J's teacher.  (She is new to our district so we
had to welcome her properly;)

I used two digital stamps from 
How to make your folder
Score a line at 6" from the top and fold
Draw out a triangle with pencil and cut outside your marks
(As shown in photos above)

Pencil wraps
Color your Super word digi stamp from Eureka
Size and flip multiple times onto a blank 8 1/2 by 11" printer/copy paper
print
run through Xyron adhesive 
cut down to fit pencil
wrap pencils

First Grade Super Star are postcards or she can use them 
for note cards or as certificates.

Super cards are actually cards the twist is I printed on photo sheets. 
She can send awesome notes home
to the parents telling how fantastic the kiddos are doing.

Than we have some Avery labels that I made into stickers for grading papers.

Product list...
2 pocket folder NO PRONGS
pencils
Avery Labels
Xyron Adhesive
printer paper white for pencil wraps
digital stamps from Eureka Stamps
Photoshop Express
HP 7000 printer
SU gg blue ribbon and card stock

and rules for the challenge.
The WINNER of the challenge
receives 5 Eureka Stamps Digital Stamps!


The Eureka Stamp Store offers Rubber and digital images giving
you the best of both creative worlds.
Please stop by Eureka Stamps Store and have a look around.
Sign up for our newsletter while you are visiting so you don't miss
out on one single moment of the good stuff.


Happy Stamp Day, God Bless!

Monday, March 26, 2012

Stationary Box

We went calling on some friends Saturday and I wanted a special hostess gift to take along. 
 Last week I was searching out ideas and came across this
Her directions are easy to follow and I love the video tutorial.
Here is one of the boxes that I made...

I did make my own pen holder by scoring PTI cardstock  
at 1 1/2" times 4 and adhering with redline tape.  The bottom is open however, the box flap holds the  pens in place as you open or close the box.

Product list...
BG Sultry Paper
PTI cardstock, ribbon and stamp sets
circle punches
post it note
stamps
pens
red liner tape
ATG


We had so much fun on Saturday and enjoyed the glorious spring day.
If you wish to see more photos of the afternoon and evening visit my Facebook Wall.

Happy Stamp Day.  God Bless!

Monday, April 11, 2011

Tour of Tables Blessed with Talent

 Tour of Tables is a fundraiser for Canton's Community Education project.  The event was held this past Saturday.  I am going to show off a few things today and more through the week.   

There is a clue hidden here in these photos as to my "big news".  I have also hidden a clue in my blog layout and in a recent video.  Do you know what my good news is?  You know I love to play games so don't post your answer here send me an email paschal.sara@gmail.com and I will enter you into a drawing for some yummy crafty treats.  (Family and Friends that are in the know are not eligible.  Count yourselves lucky that I have told you the good news first so you can bask in my ROCKSTAR GLOW.)  LOL!!

Okay, I want to play Nickelbacks version you can click to it with this link HERE.

However, I will keep a Disney rating here on the blogo with Hannah Montana...


I remember watching this so if you are in want of good laugh play this little number...


Do nothing out of selfish ambition or vain conceit, but in humility consider others better than yourselves Philippians 2:3

Other than my sisters table this one was my FAVE.
Sew Dear Holly's Hobbies by Holly Molstad and Theresa Souvignier.
Look at all the little YUMMIES!

View from another side...

Yet another....

One place setting, all were different.

A second place setting...

Chair wrapped with old apron.
Serving tables and old Ironing board and sewing table.  LOVE IT!

Kool Aid table by Gwen Lease.  This set up was really KOOL.  

Kool Aid place setting...

Circus Carnival by Julie Braaten and I Helped;)  

How did this happen?  LOL!
Just a little tease of her table top.  The rest to be revealed at a later date.
If you were at the Tour of  Tables you are in the know of my 
Rockstar status. ** If you have taken
a photograph of the carnival tabletop please do not post to the internet 
copy for contests or submissions. 
 That is right I am so good
I  now come with a copyright;)

Asian by Linda Hill and Beki Hage...

Asian place setting using authentic China brought to SD
after WW2...

After dinner we were blessed with a performance by 
"the Master's Five"
I should have run the video more they were AMAZING!

No I am not for hire. No I do not sell my creations.  No I will not do your childs birthday party!!  God has blessed me with creativity and I love to share it on a personal level with Family, Friends and Community.  
 All remaining paper treats that I personally don't use throughout the year are donated
 to the Church Youth, our local Nursing Home and other charities.

Happy Stamp Day.  May God bless our Country and the World.

Monday, September 28, 2009

Season for Card Keepers


These great little keepers hold three cards and envelops standard A2 size.
Product list...
Card keeper directions from Impressions by Rochelle
PTI card stock, ink, buttons, jute
PTI stamp sets Text Style, Everyday Button Bits
Marvy scallop punch
SU scallop circle punch, scallop border punch
stitching with chocolate thread

Happy Stamp Day!

Monday, August 24, 2009

Enjoy the Ride

Yes, I have a camera and I am still trying to figure everything out my pics and posts can only get better from here;)


This little Beauty scored a first place finish at the fair last week for the stamping stationary category, under comments they enjoyed the color combination and the organization. I used my PTI SS Reveal gift as a template however, I decided to leave off the handles and make it a bit more on the masculine side. You can find the template {here} For a more finished look of the clear boxes make sure you cut card stock to cover the inside of box otherwise when the cards and pad are removed your adhesive shows through the box. I also used a Velcro circle to adhere the flap to the back side of my tote.


Product list...
PTI Everyday Button Bits stamp set
PTI DP, card stock, ink, ribbon, buttons and clearly creative card box
Marvy scallop circle punch
cricut expression
cricut george cartridge
post it note pad
RSVP pen
SU punch, Lots of Thoughts and Borderline stamp sets
Red Liner tape
Velcro Circle
Scor Pal

It is the first day of school today D is a freshman and L is a seventh grader, my how time does fly.

Happy Stamp Day!

Thursday, April 30, 2009

Book of Cards

**PER PTI REQUEST OF COPYRIGHT INFRINGEMENT I HAVE REMOVED MY DS. CUT FILES FOR THE BOOK OF CARDS AND BRING IT ALONG CARDS. I STILL FEEL THAT THE USE OF CRICUT DESIGN STUDIO TO CREATE A .CUT FILE THAT LOOKS LIKE A PRODUCT IS NOT AN INFRINGEMENT I DID NOT PURCHASE OR USE ANY OF THEIR DESIGNS, IT TOOK ME DAYS AND HOURS TO FIGURE OUT THESE .CUT FILES FOR MYSELF AND MAKE THEM THE WAY I WANTED THEM TO LOOK**

Here are some photos of my Book card holder completed. I used my Design Studio .cut file (you can find the download posted above under blog header). This set of cards will be headed to my DH's great aunt. As you know I have had a bad week and just getting back into stamping I kept these cards really simple and just put on the PTI DP cut to 4" by 5 /4" on most of the A2 card fronts then adhered the same DP to the back flap of the envelope a simple stamped sentiment on the inside and I had 6 cards and envelopes in little time.


Product list...
Cricut
Cricut George and Basic Shapes
Cricut Plantin School Book
Cricut Design Studio
Cricut DS .cut file Book of Cards by Sara Paschal
PTI Raspberry Fizz Mix DP
PTI Raspberry Fizz Card Stock and Ink
PTI Stampers Select White Card Stock
PTI Dotted white ribbon
PTI Classics Anniversary set
Nesties
Bling
red liner tape

Happy Stamp Day!

Wednesday, April 29, 2009

Book of Cards DS .Cut file by Sara Paschal

Well a week after I started here it is...I only have the Expression version completed have to clear the fog out of my brain and get it geared up for thinking again so I can complete the baby bug version.
I will be back on Thurs with some views of my creation.

Below you see two screen shots of DS, the first one shows the cover
score cover at 5" and again at 6"


Below you see the inside holder you will need to cut two of these, I have drawn in the score lines for you in yellow.


1) Cut and score two of the inside holders
2) Use redliner tape to adhere flaps of the holder
3) Adhere ribbon to the back side of both holders leaving enough ribbon on each side for tying
4) Secure each holder to the cover with redliner tape
5) Fill with 6 cards and Envelopes
6) Tie your card box closed

Happy Stamp Day!

Friday, February 6, 2009

Bella Rose Birthday

Below is my completed Bella Rose Birthday set for my Friend. She will be celebrating her birthday on Saturday...Happy Birthday ;)


I have not made these beaded pens and chapsticks for a bit, forgot just how fun they were to make. And it never fails, I make some extra up for my craft area and the girls are wanting them. Good thing I have a two year supply stash ;)

**You will find a supply list for each of the cards in previous posts **

Product list...
SU Bella Rose DP kiwi card stock
PTI acrylic stamp box
PTI ribbon and card stock
RSVP Pens
Chapstick tube
red liner tape
microbeads
heat gun
embossing tray
glue dots
Marvy scallop punches
Happy Stamp Day! Have a wonderful weekend!

Thursday, February 5, 2009

A Green Bag

Okay, you now know my bag is not GREEN in color but it is indeed green because I have recycled and empty PTI stamp box for my project...
My apologies for the scan, I have yet to replace my camera and it is very difficult to scan any type of 3d item let alone one that is made from acetate, UGH!


Here is the link for the PTI contest page Thursday, the guidelines are to make your own bag.

Nichole has show us this technique of the z-becky brown bags in the past.

Product list...
PTI stamp box
PTI card stock and vellum
PTI DP
PTI Ribbon
PTI Heart Prints
Marvy scallop square punches
Basic Grey Button
SU silver cord

Thanks go out again to Chrys23 and Hermanator for sharing the new PTI products with me, thank you ;)
Happy Stamp Day!

Friday, August 22, 2008

Keeping Track of CASE's


I have many many swap cards and previously made cards that I look back in reference to. I thought I would show you how I file them so they are easy to find.

You need two products...
Binder
Protective Binder sheets

Mine is a smaller version that holds four cards per sleeve you can purchase a regular 8 by 10 size and it would hold 8 cards per sleeve.

I take the cards out of the binder and place them in a plastic envie and tack them up onto my cork board when I am ready to copy them.

Happy Stamp Day!

Monday, August 4, 2008

30/30 Challenge Countdown Day 3 Christmas in July


Card Clutch Pattern by Rochelle found {here}
Jen's 30/30 Challenge found {here}

So a girl out of her favorite adhesive (Scotch Brand double sided tape) running low on other adhesives starts to think of Christmas in JULY! That is right, now that my space is organized I sat down on Sunday afternoon and wrote out a Christmas list (a hand made) Christmas list. So when I was done I counted up how many card keepers I would need to make and the answer was 12. So I came up with a pattern that I liked using my older stamps made up a sample then cut, punched, colored and pieced my way 'til I had five more sets ready for adhesive. So that quick I have some Christmas gifts ready to go.

The entire time I was thinking to myself Self, why do you think I need the latest and greatest supplies? I never thought of it before I started my blog, back then everything I had I used and loved. Now it is a Rush to get the latest and greatest and let me tell you one stamp company knows how to sell me the latest and greatest and knows how to make me want it. (I went to business school, I know the drill on how to focus and sell to a group of people, I understand the tricks and psychology involved yet I let it happen to me.) Not anymore! Jen's challenge has brought back the love for the stuff I own, what is old is new again RETRO is the word. So in the future if you come to my blog to see me craft with the latest and greatest, it probably won't be found, what you will find are hand crafted items made with the products I love, the products I have on hand and are RETRO.

My other thoughts were why do I have to wait for the new SU Catalog or the New PTI release to start my Christmas crafting, I have what I need to do the job on hand. Don't get me wrong I am sure I will be purchasing the new PTI colors because I have fallen in love with the Palette Inks possibly even a new release stamp set. But my new focus is going to be on the basic tools: ADHESIVE, ENVELOPES and did I say ADHESIVE! LOL!!

Product list...
SU RETRO stamp set "Tags and More"
SU RETRO stamp set "Riveting"
SU RETRO Wasabi ink, ribbon and Card Stock
SU RETRO Purely Pomegranate ink and Card Stock
SU RETRO Blue Bayou ink
SU aqua painter
GP white card stock
Glue Dots
CM corner rounder
Circle punches

Happy Stamp Day!

Tuesday, July 15, 2008

30/30 challenge Day 6 "Genie" Bag...


Directions to make Genie Bag on SCS

I love these they are so much fun to make and give as gifts. This one full of goodies is my reveal gift to this round of DSS on SCS. Have you signed up for this user group yet? So much fun to meet crafting friends this way you should give it a try. You can find it here User Groups Divine Secret Siblings over on Splitcoaststampers.com. Some of the products I used on my bag are from my Wonderful Big Sis for this round, she has spoiled me greatly and I LOVE IT! Thank you Sis!

Product list...

White craft sack
SU card stock Boarding Blue, chocolate chip and creamy Carmel
SU Scallop Circle punch
SU Polka Dot and Paisley stamp set Thank you Barb;)
Circle punch and 1/8" hole punch
SU Alpha Quirky
PTI Borders and Corners Circle stamp set
DCWV Brown Paisley DP
SU word window punch
Rubicoil Notebooks by Wanda
Card Keeper Directions by Rochelle
Beaded Pen Directions by Rochelle

Happy Stamp Day!

Sunday, June 15, 2008

Diaper Bag Technique (a tutorial)...

This was my submission project for the PaperTrey Ink Best Baby Gift June GSS. It is a stationary set tucked into a diaper bag, such a great gift for a busy new Mom. She can track her gifts with the notebook and send out personal thank yous using handmade cards. Thank you for visiting, enjoy!


My finished project holds 6 matching cards with envies, two beaded pens and a mini altered composition notebook.


Supply list...
designer papers
card stock
ribbon
7" zipper
red line tape
Velcro
Fiscars score blade or Scor-Pal
corner rounder
sewing machine

Tutorial...
1) First you will need to make two Card Keepers.
The template can be found here
Impressions Card Holder
Use your Designer papers for the card keepers


2) Cut the bottom of your diaper bag from the same designer paper you used for the card keepers.
6" by 2 1/2" is the dimension


3) Cut your sides for the diaper bag from the same designer series paper as your card keepers and the bottom of bag.
2 1/2" by 5" (you will need two of these pieces)
Score on the tall side at 4 1/2" (this will make your flap to attach the sides to the bottom of your bag).

4) Attach your sides to the card keepers using redliner tape.

Photo above is of one side attached to one card keeper


Photo above is of one side attached to both card keepers


Photo above is of both sides attached to both card keepers


5) Attach your ribbon to the diaper bag using redliner tape, start your ribbon on the bottom of one of the sides.

Above photo shows you where to start adhering your length of ribbon


Above photo shows you how your ribbon looks when it is attached completely to the bottom of the diaper bag

6) Attach your bottom to your scored flaps of the sides and the bottoms of your card keepers.

Above photo shows the bottom attached to the diaper bag


Above photo shows your diaper bag as it should look after completing the above steps

7) Now you are ready to make your side pockets.
cut two pieces of card stock 3" by 3 3/4"
Score these pieces 1/4" on three sides (Do not score the top.)

Above is a photo of the two side pockets and how they should be scored then folded

8) Attach your pockets by placing redliner tape on your 1/4" folds and adhere to your diaper bag sides. Now this would traditionally become your bottle holders of your diaper bag, I used my side pockets to hold the beaded pens for my stationary set.

Above photo is of the completed pocket on the diaper bag

9) Center top closure is made by attaching your card stock with redliner tape to your 7" zipper. If you have access to a sewing machine this would be a fantastic place to use it to attach your zipper to the card stock. (For my project I stuck with the redliner tape, I do have issues with the zipper pulling off as you try to zip or unzip the diaper bag.)
Here are the dimensions for the card stock 6" by 1", score the length at center 1/2". You will need two of these strips.


10) Attach your zipper and card stock to the card keepers with redliner tape.

Above photo you see the zipper attached to the card stock, I used redliner tape and placed the card stock right up against the zipper teeth. For this diaper bag I used eyelets to help adhere the zipper to the card stock where I have used Faux stitching I would recommend that you used an actual sewing machine.

Above photo shows the zipper assembly attached to the diaper bag.

I would love to see your Diaper Bag project please link in the comments for this post or send me a pic my email addy is paschal.sara@gmail.com

Happy Stamp Day!

Tuesday, June 3, 2008

TLC171 Thank You So Much...


For Monday's TLC171 Challenge on SCS Beth (Showmestamper) had this for us..."Today, our challenge is to make a few 3x3 cards, matching envelopes and a cute box to store them in....in other words, the whole enchilada!

You can find templates for the envelopes and the box at this thread:
http://www.splitcoaststampers.com/fo...3#post10005143"
Below is a photo of the box template posted in the above link...


I do not make many 3 by 3 cards and I have envies so I did not make my own envelops for this challenge. On the downside of this the SU envies do not fit well in this box as it is shown. This box is also a wonderful tuck box, I used the flap as part of my front design and it closed with half a Velcro circle.

Product list...
SU Chocolate Chip Card Stock and Ink
SU Mellow Moss Card Stock and Ink
SU Rose Red Card Stock and Ink
SU Very Vanilla Card Stock
SU Scallop Circle Punch
SU "Riveting" Stamp Set
SU ribbons
Circle Punches
Velcro
Computer and Printer

Happy Stamp Day!

Tuesday, May 6, 2008

Stinkin' Cute RAK

My BIL's Mother loves to collect skunks so this set is going out as a special RAK for her...SHHH it is a suprise!


The Card Clutch directions can be found here at Impressions by Rochelle.

I purchased my Rubicoil notebook here at My Creative Corner by Wanda.

The cards on the inside can be found in these previous posts...
CC164 from flat to PHAT
From flat to PHAT part 2

Product list...
SU basic black card stock
SU purley pomegranate card stock
SU soft sky card stock
SU SAB rub-ons
SU stinkin' cute stamp set (WRAK images)
SU pretties kit
SU organdy ribbon
notebook
circle punches
stickles

My Pretties kit has set idle for a long time, this past week it has gotten a total workout. I love how the small flower looks in the skunk's hand, so cute.

Happy Stamp Day!

Monday, May 5, 2008

Pocket Book Tutorial


Here is an open view of the Pocket Book with one of the cards and bookmark tags showing. For these items I used the Everyday Blessings stamp set from PTI.


I had one full size sheet of Porcelain Prints DP left so I decided to make this pocket book, so fun and really easy to do...

Supplies...
1 12" by 12" piece of DP
1 8 1/2" by 11" Piece of Card Stock
*Bind it All
*Bind it All Wire 1/2" ring size
Paper Scraps
Ribbon
Paper Trimmer/Scorer
Tombo Multi Adhesive
Circle Punch
Stamps
Cricut
SU pretties kit
stapler

*If you do not have a Bind it All you can punch holes and tie off the book with ribbon.

Step by Step Tutorial...
1. Cut your 12" by 12" DP in half
2. Score your half sheets of DP at 6" (Short Side)
3. Score your half sheets of DP at 2" (Long Side)
4. Fold on score lines
5. Glue around the outer edges of the DP on both sides, make sure to leave the top open, (this will make your pocket).
6.Cut your card stock to these measurements 4 1/8" by 8 1/4" (you will need two pieces of card stock this size.
7. Score card stock at 6 1/8"
8. Glue around the open sides to create a pocket, make sure to leave the top open, (this will make a pocket).
9. Punch your pocket book with the Bind it All, (you can use a hole punch).
10. Bind your pocket book with the Bind it All 1/2" wire, (you can use ribbon).
11. When you are done with these steps you will have made 8 pockets.
12. Decorate as you wish using stamps, paper scraps, ribbon, rub-on's, brads etc...

What a wonderful project for a Mother's Day Gift!
My Pocket Book holds 10 3 by 3 cards with envelopes and 4 bookmark tags. I kept the project simple by picking what I was going to use before I got started then I just stuck to the items I had out.

Happy Stamp Day!