So are you asking yourself what she is going to do now with fish tank tube do you really want to know? Sure you do and I bet once you make one you will keep on making these. They are really fun, easy to do and all ways are a fantastic seller at craft shows, Bracelets....Made with paper scraps and fish tank air tubing.

Here is where the story starts, I saw an entry last month in the digital contest at Paper Trey and it took my breath away. (Turns out she was one of the winners of the stamp sets, don't have to wonder why here is the example Capture the Moment WCMD winners.)
So I looked around SCS for a way to make it and found Marriam she told me how to get it done. Take a peak at her wonderful design.
However I changed gears a tad from the way these were made I make all my bracelets with toggle clasps, crimp beads and wire. I do not like to use the stretchy cord, but you can if it is your preference. I have not had any luck with the knots even when they are super glued, beads are all ways flying when I use stretch cord.

So to make my bracelet you will need...
Toggle Clasp
Crimp Bead
Beading Wire
Fish Tank Air Tubing (Wal-Mart)
Scrap DP
Glass Beads
Spacer Beads
Jewelry Pliers (to cut the wire and crimp the crimp bead)
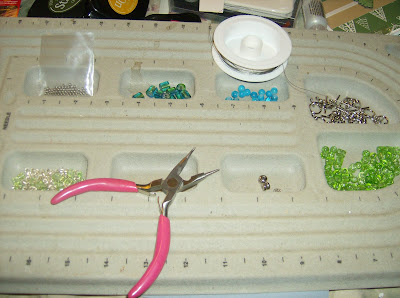
Beading board (not necessary but is wonderful to have if you make a bunch of beaded items like I do, shown in the above photo.)
To make your paper bead cut scraps of DP no longer than a toothpick and 1/2" wide. Roll the paper around the toothpick and insert the paper into the fish tank tubing. Cut your beads the length you wish them to be.
Standard bracelet length is 7 to 7 1/2" I am far from standard and make mine 8 to 8 1/2" in length.
Step 1 cut a 10" length of beading wire
Step 2 put on a crimp bead
Step 3 put on one end of the toggle and bring the wire back through the crimp bead
Step 4 Crimp the crimp bead with the Jewelry Pliers and you have one end completed.
Step 5 string on your beads
Step 6 crimp bead
Step 7 other end of toggle and bring wire back through the crimp bead
Step 8 crimp the bead and you have your bracelet.

I so wanted to show you in photos how this is done but I do not have the right camera for such detailed shots so if you have questions leave them on this post or email me Paschal.sara@gmail.com, I would love to see what you make with this.

1 comment:
Great job with yours Sara. I used elastic and they don't look half as elegant as yours do with the toggle. TFS
Post a Comment