You can download my .cut file here
.cut file Mickey T, you will need the Mickey and Friends Cartridge to cut this file in DS. This file is sized for a child's size 6 T.
Another use for my Cricut Expression and happy to have DH working the meat counter? Yes, I used the Cricut to make this T for my Nephew's Birthday. Tutorial below. My DH works the meat counter at our local HY Vee, his boss was confused when DH asked him for some plain freezer paper then he chuckled when DH said the wife has an Idea for crafting with it.
What you will need...
Washed T
Freezer Paper
Cricut Expression
Cricut Cartridge
Cricut Design Studio
Iron/Board
Acrylic Paint
Fabric Medium
Paint Brush
Tutorial...
1) Wash your T and let dry.
2) Iron your T flat.
3) Slip in a cardboard liner (cereal box works great) this is so the paint won't bleed through your T.
4) Pick your design for the Cricut.
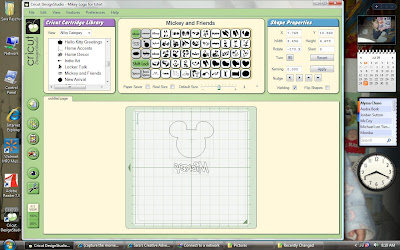
5) If you use DS as I did make sure you flip your print.**
6) Place freezer paper shiny side up on your cutting mat.
7) Cut your design.
8) Iron the negative (stencil) shiny side down on your prepared T.
9) Mix some Fabric Medium with your acrylic paint (or you can use fabric paint).
10) Paint the open parts of your stencil, let dry.
11) Most colors will need two coats, let dry.
12) Wash normally but I would turn inside out.
**You don't need DS if you don't have the program just cut your image as you normally would with the cricut. However, I don't think the baby bug has the flip feature so you would not be able to do any print. Your print will need to be flipped in the program as you see above in the screen shot because you are cutting your freezer paper shiny side up (if you cut shiny side down it does not adhere to the mat well and you won't get a crisp cut).
Happy Stamp Day!


